
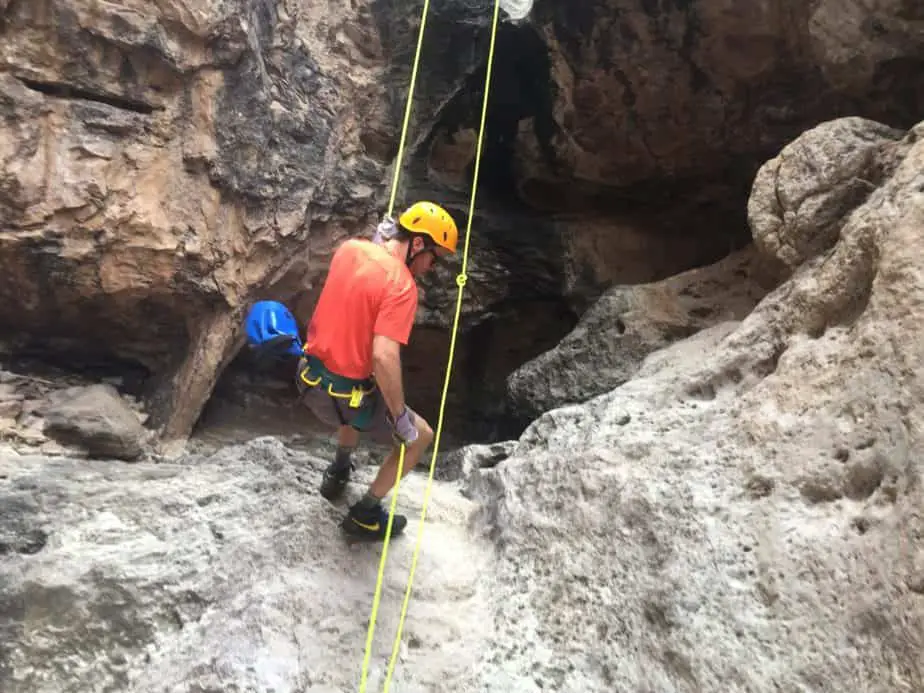
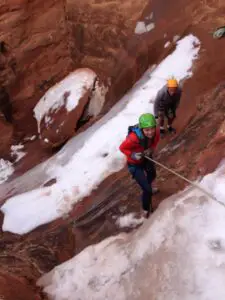
Rappelling can be a dangerous sport, because you are jumping off a cliff and hoping for a controlled slide down a rope. You can stay pretty safe if you constantly have good habits such as double-checking knots and tying back ups . Make sure you are experienced and have a back up plan in case of any emergencies. It is helpful to know what can go wrong to be able to prevent any accidents and stay safe.
The 10 Most Common Mistakes While Rappelling That Can Cause an Accident.
- Human error
- Not backing up the rope
- Carabiner fails to lock
- Not using an autoblock knot
- Incorrect use of a rappel device or loose items getting stuck in a rappel device such as hair, t-shirt, or loose gear
- Losing control
- Rope getting caught on a sharp edge or stuck
- Letting go of the rope
- Extreme weather
- Anchors failing
Climbing sports are dangerous because a fall is always possible. Rock climbing is typically more safe than rappelling because the rope is often attached to many points for protection to create what is called redundancy in case of a fall. While rappelling, you are only connected to one anchor system at the top of the cliff and you are trusting your life to that single anchor to be secure.
Every year there are rappelling accidents that account for climbing injuries and fatalities. It is a dangerous activity. Most accidents are due to human error and can be avoided! This post will cover some of the main rappelling accidents, as well as safety tips to avoid these mistakes.
1. Human Error
Virtually all rappelling accidents fall under this category. Double check and triple check everything and then have your partner check everything before beginning any rappel, even if you’ve rappelled this same spot a hundred times! Don’t ever get lazy, and try not to be in too much of a rush. Pay attention and don’t take short cuts.
It’s just best to use your brain and if you ever wonder if something is “safe enough” it’s probably best to take the time to double check and have a backup. Listen to your gut feeling. Check that anchors are safe, always check that harnesses are worn correctly, check all knots, wear a helmet, don’t skimp on gear- buy safe and sturdy material, and always bring extra gear so you’ll have enough in case you need to make a new anchor or have a backup if you accidentally drop anything.
Get into these habits and don’t let lazy friends keep you from these habits. It’s comforting to go rappelling with an expert, but that doesn’t mean the responsibility should be solely theirs for the safety of the group. Make sure that each rappeller pays attention and knows how to double check for safety.
Each person should be alert and help each other. Yell “On rappel!” to the belayer before you descend, and wait for the belayer to yell back “rappel on” to confirm they are attentive and ready. Then yell “off rope” before the next belayer descends. Get into good habits now.
2. Not backing up the rope
In 2015, a rappeller in Nevada couldn’t quite see the belay area below her and hadn’t tied stopper knots in her rope. She ended up rappelling off the end of her rope and falling 20+ feet, waking up in the hospital a week later with many broken bones! Recovery for this type of injury is long and brutal.
Rappelling off the end of your rope is a problem that is easy to avoid. As part of the rappel set up, make sure that you have enough rope to reach the ground and tie a stopper knot that won’t slip through your belay device so you won’t rappel off the end. This is especially important if you can’t see the end of the rappel. Using a friction hitch above or below the rappel device is another way to back up the rope while you are rappelling to make sure that any mistakes do not lead to a groundfall.
3. Carabiner fails to lock
Some years ago in Colorado, a beginner was learning to rappel and fell 20 feet because the carabiner system failed, somehow coming unclipped from the harness. The carabiner was either not locked or had come unlocked. Similarly, in 2015, a rappeller on El Capitan fell 200 feet and was later found to not be connected to his belay device.
Always double check that you are wearing an appropriate size of harness, that your harness is in good condition, and that the rope set up through your harness is correct. The rope is attached to you through your belay/rappel device that is on a locking carabiner. Always make sure that your carabiner is locked! Now check again that it is locked. If it isn’t, the rope could easily come out of the rappel device, leaving you to fall to the ground. This is a costly mistake that is easily avoided.
Here are 2 options on locking carabiners:

- Auto locking carabiners:
- About: An auto locking carabiner is a carabiner that locks itself shut after it has been opened for added safety. It the gate is closed, it automatically locks itself. You don’t have to screw it closed yourself like with a screw gate carabiner. Auto locking carabiners have been around for a while, but are becoming more popular. With design improvements, they are easier to use and less bulky. Auto locking carabiners require 2 or 3 steps to open the carabiner to add as much safety as possible into the system. An optional push down, then a twist, then pressure on the gate opens the carabiner.
- Pros: Auto-lockers are typically faster and safer than screw gate carabiners. Easy to use.
- Cons: They can be tricky to open with one hand. They can get you out of the habit of locking your carabiner if you ever switch back to a screw gate.
- Screw gate carabiners:
- About: A screw gate carabiner has to be manually closed. and screwed shut to lock. These aren’t a bad option because it keeps you in the habit of always checking your carabiner anyway.
- Pros: Generally cheaper and lighter than auto locking carabiners.
- Cons: Only safe if you remember to manually screw to lock.
4. Not using an autoblock knot
Climbers have rappelled to their deaths by losing control on El Capitan in Yosemite with some long and fast rappels that require great skill. An autoblock knot may have helped to catch them when they were rappelling too quickly.
Using a backup knot will help keep a rappeller a little bit safer. A prusik backup knot above the rappel device can act as a good backup, but an autoblock knot below the brake hand may be a better practice. An autoblock knot is tied in case of losing control or letting go of the rope, that way the autoblock knot grabs the rope and stops the climber.
An autoblock knot helps keep rappellers safe and should be used often, if not always. It is especially helpful in situations where beginners are rappelling, hands or ropes are wet or cold, if you see the rope is caught and you need to free it, if you need to pendulum to the next rap station, or if you can’t quite see the bottom of the rappel.
5. Incorrect use of a rappel device or loose items getting stuck in a rappel device such as hair, t-shirt, or loose gear
A beginning rappeller was descending a route in Arizona when her loose hair got caught in her belay device. She screamed and struggled, which got her more and more caught. Hikers tried to help and made it worse. She was stuck until a rescuer could rappel down, connect her to a new rope, and cut her own rope to free her.
A common rappelling problem is when hair or loose clothing gets caught in the rappel device system. The rappeller could become stuck and not be able to get themselves free in the middle of their descent, and any struggling might get them even more caught. A rappel extension can get rid of this problem by keeping the device further away from anything on your person that could get caught.
Pocketknives could be handy to carry in case of an emergency like this in the middle of rappelling. It is important to dress carefully, wear the right clothing for rappelling (don’t wear anything too baggy or loose), and be careful about any gear that could potentially get caught. Keep long hair tied back in a ponytail, or better yet, a braid or bun.

6. Losing control
In 2011, a rappeller going through a canyon in Arizona lost control while going too fast on a rappel using his figure 8 rappel device. He was already out of control and could not regain control of his speed. He did not have any backup knots or a belayer and couldn’t do anything to slow himself. He hit a ledge and then fell another 40 feet down the canyon. After regaining consciousness he could not move due to severe pain and had to be helicopter rescued from the canyon, which took 30 hours and 36 rescuers. In this situation, the first rappeller should always tie a prusik knot, and any other rappellers could use a fireman’s belay.
Inadequate preparation or experience can be very costly in rappelling. Pay attention and be cautious at all times. Continue to follow the safety tips listed throughout this article. A friction hitch will help in case of becoming unconscious or other reasons of losing control. A prusik or autoblock knot is a good backup. These each provide redundancy in the rappel for safety. And, always wear a helmet!
7. Rope getting caught in a crack
Two rappellers in Yosemite forgot about the stopper knot tied in the end of their rope. From below, as they pulled their rope through the anchors, it got stuck and they couldn’t recover their rope without assistance. They had to wait for rescuers to come.
It is pretty much always a good idea to tie a stopper knot in the end of the rope while rappelling, but don’t forget to untie it and don’t pull the wrong side of your rope from the anchors if you are using 2 ropes tied together. You can also tie the ends of your rope together so you don’t forget the stopper knots.
If your rope does get caught on a ledge or tree while rappelling or in heavy wind, you have a few options. Give the rope a gentle pull, then try to whip and flip it around to get it free. Always be careful of any dislodged rocks. Stop on a ledge and try pulling from a different angle, if possible. The last resort is to use a prusik or ascender to lead up to the anchor and fix the problem (you’ll need a lot more detailed information than just this paragraph if that’s what you’re going to try). You can also cut your rope in case of emergency. Cut it as far up as you can so that you can rappel on any remaining rope.
8. Letting go of the rope
A woman was rappelling in Joshua Tree National Park when her rope became tangled. She stopped to untangle it and let go of her rope, which caused her to fall.
I shouldn’t have to say this, but try not to let go of your rope! Always use some sort of backup, and if you are going to stop, lock off the rope around your belay device. Wear gloves so that your hands don’t get rope burn. Tie a backup just in case. A friction hitch is an easy way to avoid a fall in a situation where you let go of your rope.
9. Extreme weather
Two rappellers were descending a route in British Columbia when a lightning storm developed. One was rappelling and lost consciousness during a lightning strike, but his rappel back up device held him and saved him from a fall. He was only exposed to a small fraction of the current and was able to eventually finish the rappel with no major injuries.
Always use the buddy system and tell someone where you are going and when you expect to be back. Always check and double check the weather before you go! It is not wise to go rappelling in any sort of rain, snow, or storm.
Acts of nature aren’t typically seen as the main cause of any rappelling accidents. Mostly all accidents can typically be traced back to some form of human error such as not checking the weather, not bringing appropriate gear or clothing, or not turning back when a storm is developing. Poor judgment leaves the climbers or rappellers vulnerable to natural hazards.
10. Anchors failing
Pierre Beghin was a famous french mountaineer and lost his life on a trip to the Himalayas as his anchor broke and he fell over 1000 meters. His climbing partner was left to descend almost 1 mile alone with a broken arm. It took him 5 days.
Even the most experienced professionals encounter difficulties. No matter what you do to prevent accidents, rappelling is dangerous and can never be 100% safe. The risks cannot be totally eliminated, so learn to be prepared for whatever could happen. Test your anchors very carefully! Put your weight against the anchor system to make sure it is sturdy and will hold you before committing to the rappel.
BRAKES Acronym. How to stay safe while rappelling.
A common acronym used in climbing schools and with guides is “BRAKES.” This is a good reminder to help you remember to check every aspect of your rappelling system before you descend.
B- Buckles on your harness. Make sure they are snug and set up appropriately. For some older harnesses, you have to double back through with the straps.
R– Rappel Device and Ropes. Double-check your locking carabiner on your rappel device, check that the rope has been loaded correctly into the device, and the rope is correctly set up.
A- Anchor. Make sure that the anchor is strong and be sure to test your weight before descending. Make sure it isn’t damaged. If using a boulder, ensure that it is big enough and heavy enough and will not move. If using a tree, check that it is alive, sturdy, and will easily hold your weight.
K- Knots. Check every knot in your rappelling system. The anchors, any knots joining 2 ropes for a double-rope rappel, your belay device set up, etc.
E- Ends. Ensure that the ends of the rope reach the ground or the next belay station. Close your system with knots at the end of the rappel ropes.
S- Safety Backup and Sharp Edges. Use an autoblock as a backup while rappelling. Also make sure that the rope won’t rub on any sharp edges while you are rappelling and adding your weight.
Conclusion
These accidents are scary and very real! If they can happen to the pros, they can definitely happen to you. I can’t say it enough times, Be Careful! Be prepared, be redundant, and triple check everything. Do not get complacent even if you’ve rappelled the route a hundred times before. Better to be safe a thousand times than to be dead once!
Now pick one practice of your own to change or to pay more attention to in order to keep yourself safer!
