
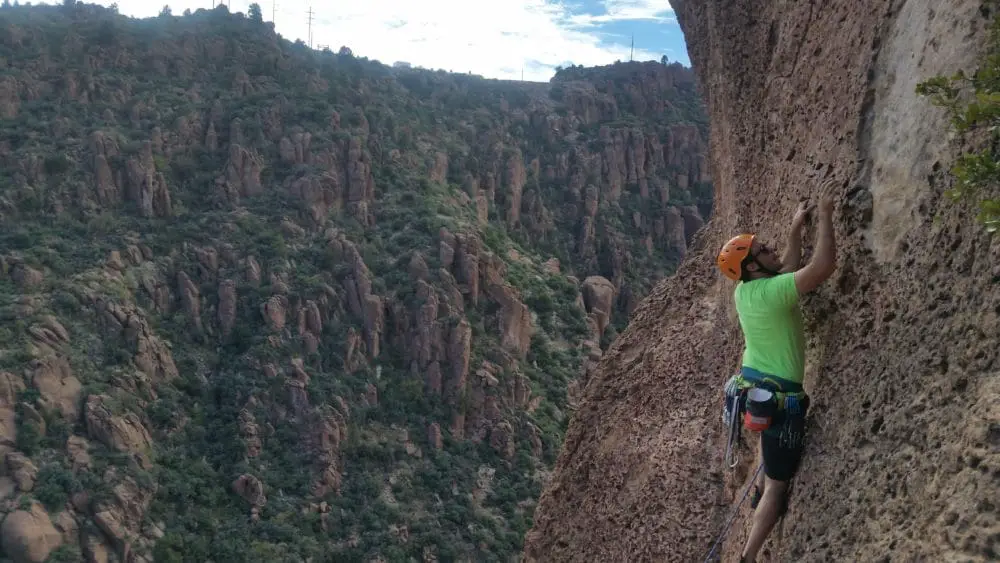
A lot of people learn to rock climb indoors, which is awesome. It’s a great physical challenge requiring strength, endurance, and finesse. It’s also a great way to meet people and make friends for life.
After climbing indoors for a while though, many people want to take the next step and try climbing outside. This guide encompasses everything you need for Sport Climbing Outdoors.
What Do You Need for Outdoor Climbing?
- Harness
- Climbing Shoes
- Helmet
- Dynamic Climbing Rope (60m)
- Quickdraws (12+)
- Carabiners (3+)
- Personal Anchor System
- Belay Device
- Belayer
Climbing outdoors can be intimidating, but it doesn’t need to be. The best way to start is to find a partner who already climbs outside, and go along with them.
Learn how to use the gear, and consider taking a course from a reputable guiding company. This is the bare minimum amount of equipment that you need in order to start sport climbing outdoors safely.
Technical Equipment Needed for Climbing Outdoors
If you already climb indoors then you already have a decent start. Unless you have a very specialized harness or shoes, you can use them indoors and outdoors. The only other personal equipment you need is a helmet, if you’re able to go with someone who has a full setup already.
As you start getting more into sport climbing outside, you’ll need to gradually make the investment and pick up your own gear. This guide will get you started.
If you want to see the specific gear that we use and recommend, go over to our Recommended Gear Page .
.
Harness
As mentioned above, you can most likely use the harness that you already own for gym climbing. There are lots of different types of harnesses that work for outdoor climbing. The most important features to look for are safety, comfort, and ample gear loops.
Learn how to fit your harness properly and make sure to use it how it was designed. In the great outdoors, there’s no nice employee wandering around to correct your technique or safety.
Make sure that any harness you buy is designed for rock climbing and certified by a professional organization like the UIAA or CE. The easiest way to do this is to buy one from a climbing brand like Black Diamond or Petzl.
Don’t buy a cheap harness from an unknown brand because they may not have gone through the necessary safety and testing requirements. It’s a mistake you would only make once!
Harnesses should be comfortable to wear, even when hanging from a rope. The cheapest harnesses are made of thick webbing, which kind of looks and feels like a seatbelt in a car. They work for gym climbing, but are uncomfortable when climbing for long periods of time.
Instead, buy a harness with padding built into the hip belt and leg loops. Pay attention to the size of the harness. Some are very adjustable while others only fit a narrow range of waist sizes.
When picking a harness for outdoors, you need to get one with gear loops. Some indoor harnesses don’t come standard with gear loops, so if this is the case you’ll need a new harness. These gear loops are used for keeping your Personal Anchor System and quick draws out of the way while you’re climbing.
Good Climbing Harnesses can cost anywhere from $40 to $100 USD. In my opinion, there aren’t really many bells or whistles that are worth shelling out the extra cash for a more expensive harness as long as you have the features explained above.
Climbing Shoes
Your climbing shoes have always wanted to get outside on real rock. They weren’t meant for plastic! A few climbing brands have created shoes specifically designed for climbing indoors, but the vast majority of shoes work both indoors and outdoors.
When selecting climbing shoes, you have to make a decision about how agressive you want to go. More agressive shoes shift your weight more onto your toes, which means better performance. On the flip side, they’re a lot less comfortable to wear.
The trade-off between comfort and performance is up to each climber. If you are newer to climbing, I recommend going with more comfortable shoes. They’re better for all-around climbing, and you won’t have to take them off between each route.
You will notice that your climbing shoes wear out faster when you climb outdoors. Rock is a lot more abrasive than plastic. Read about how to make your climbing shoes last longer in this article. Climbing shoes usually cost between $40 and $150.
With shoes, as opposed to harness, you tend to get what you pay for. Some climbers use a cheaper pair for climbing outdoors and save their nice pair for inside, but others do the opposite. Most just use one pair for both. For more information on the cost of climbing shoes, read our article How Much Do Climbing Shoes Cost?
Helmet
Climbers affectionately refer to helmets as ‘brain buckets.’ I’ve never seen someone wearing a helmet indoors. While accidents indoors do happen occasionally, they almost always involve ankles and wrists. When you climb outdoors you need to consider a few different things in terms of safety.
First, there is the ever-present risk of rockfall. Whether or not there is someone, or something, up above you, there is always the chance that a rock may fall. Rocks can be pebble-sized, or can be the size of a refrigerator.
A helmet won’t help out much with the latter, but will protect you from more than your skull will. Both the climber and belayer should wear helmets whenever possible.
Second, if you were to take a ground fall while climbing inside you would hit a big thick foam pad. It’ll hurt, and maybe break some bones, but shouldn’t kill you. If you fall outside, you’ll hit nice, rock-hard dirt- or even rocks. A helmet might save your life.
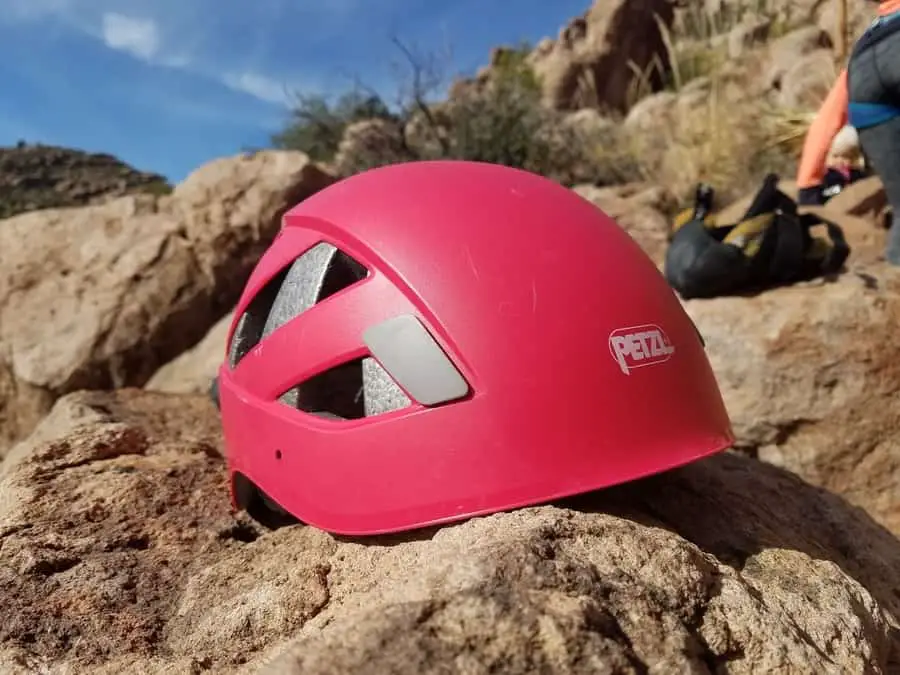
Types of Helmets
There are a few different types of climbing helmets. The cheapest are hard-shell helmets, and the most expensive are foam helmets. Hybrid helmets are a great choice since they protect against bumps and dings as well as serious falls.
In the end, the best helmet is the helmet you’ll actually wear. Spend what you need on a helmet that is comfortable and convenient enough that you’ll actually wear it.
Climbing helmets cost between $50 and $150, and usually last about 5 years unless you take a bad fall. This a lot cheaper than a hospital bill!
I wrote a lot more about climbing helmets and when I think they are and aren’t necessary in this article: Do I need a helmet for climbing?
Dynamic Climbing Rope (60m+)
The biggest hurdle between most gym climbers and outdoors climbers is usually the rope. A rope costs as much as all of your indoor climbing gear- combined. You buy a rope when you are sure that climbing is something you are serious about.
The optimal rope length really depends on the area where you intend to climb. Most of what I seen in the Western United States is set up for a 60-70m rope. Except for big wall climbing, you’ll rarely see areas that require longer ropes than that.
Generally a 60m is long enough, but some areas have a couple of routes that require a 70m rope. Make sure you know what you’re climbing, and always tie a stopper knot in the end of the rope.
There are a few different features when it comes to dynamic ropes, including diameters, middle marks, and dry treatments. What you need really depends on the region where you plan to climb and how much you want to spend.
For more information on climbing ropes, check out What are Climbing Ropes Made Of? and What is the Best Diameter Rope for Climbing?
Quickdraws (12+)

Although some climbing crags do give you the option to top rope a couple of routes, you will need to learn to lead climb in order to really enjoy yourself outside. Lead climbing sport routes requires quickdraws. If your gym has a lead climbing area, you’ll see a bolted variation of quickdraws on the walls.
Ideally, you should have 12 or more quickdraws (they usually come in packs of 6). This is enough for the majority of climbing routes, with two extras you can use to set a top rope on the anchors. Guidebooks, and even Mountain Project usually let you know how many draws you’ll need, so make sure you have enough.
It can be helpful to have a couple of longer Alpine draws (quick draws with a longer dogbone) to help manage rope drag, but it’s not essential. For more information on the types of quick draws available, check out How Much Weight Can a Quickdraw Hold?
Carabiners (3+)
At a minimum you need one locking carabiner, which you’ll use in conjunction with your belay device. You should always have a couple of extras to be used in other places throughout the system. For example, you can use locking carabiners as a part of your PAS, and as a component of your anchor.
You have several choices when it comes to locking carabiners. The more traditional option are screwgates, but newer carabiners offer other types of closures like magnetic and auto-lock. I think it’s best to learn with screwgate carabiners so that you develop the habit of always checking to make sure they’re locked before relying on them.
3 locking carabiners is a good place to start. Always check to ensure that they’re locked before weighting them, and check your partner.
Personal Anchor System
Your Personal Anchor System (PAS) is what you use to secure yourself to the wall whenever you aren’t using the rope to do so. PAS is the name of Metolious’ version, but everyone calls every tether a PAS (just like every tubular belay device is an ATC).
This could be during a multi-pitch climb, or when you’re rigging an anchor. There are lots of different types of PAS setups that work well.
You may see some old-timers use a daisy chain, but this isn’t recommended since they can fail at the low force rating of 2-5kN. They’re just not designed for dynamic loads (no PAS or tethers are either, but they are usually a lot stronger).
PAS are designed for static loads, so don’t intentionally fall on them. That being said, it’s comforting to know that they can handle it.
The simplest PAS, and the one that I use, is just a sling or tether with a locking carabiner on each end. Every climbing company makes their own PAS, comprised of multiple interlocking loops. Either of these options is great, but for maximum strength make sure you connect it to the top and bottom loops of your harness, not just to the belay loop.
Belay Device
Most gyms nowadays make you use an assisted-braking device like a GriGri to belay. If not, then you’ve already got a belay device and you’re good to go. Lead climbing with a GriGri is a little bit weird, so some climbers stick to more rudimentary devices like an ATC.
Most climbers seem to agree that everyone should learn to belay with a tubular-style belay device, and be comfortable using them. The mechanics are extremely simple, and this way you are forced to keep your brake hand on the rope at all times.
The idea is that if you learn on an assisted braking device you may develop bad habits that would cause accidents if you ever belay someone on an ATC. I agree.
Tubular Devices are cheap (~$20), and last a really long time. They’re lightweight too, so they aren’t a pain to keep with you as a backup. Buy an ATC (or any one of the many identical devices), learn to use it, and then switch over to an assisted-braking device later on.
If you ever decide to try canyoneering, an ATC works better for rappelling than a GriGri. For more on assisted-braking devices, read my review of the Beal Birdie.
Belayer

The last necessity for climbing outdoors is a partner. If you’re just starting out, or just transitioning from indoors to outdoors, try to find someone who is experienced and can teach you safe techniques. My article Can I Rock Climb Without a Partner? provides some tips for how to meet climbers and find a good partner.
Practice with your partner on the ground and within the first bolt or two before you’re trying to communicate from 30 meters up. Accidents happen when people make mistakes, so don’t let that happen.
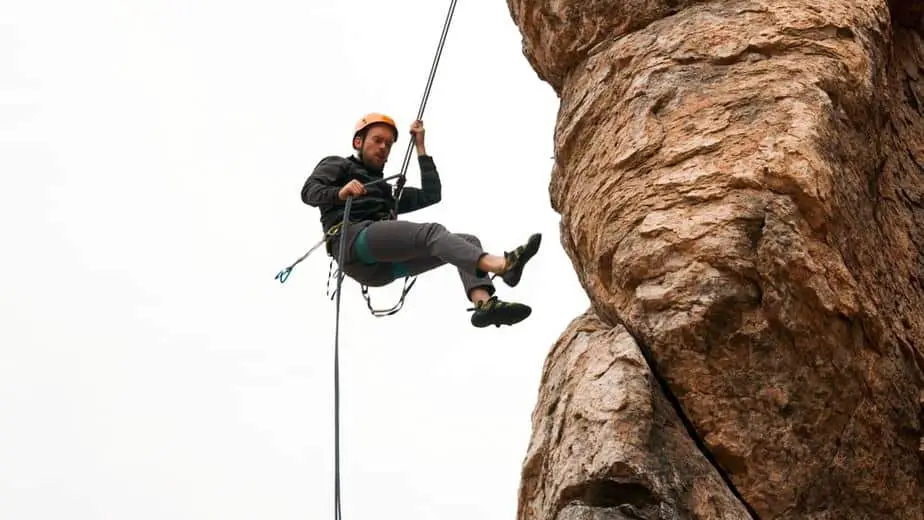
Make sure you’re both clear as to whether the climber is going to rappel down or be lowered, and establish basic commands before you get on the wall. One of the best parts of climbing is the people that you meet along the way. There’s nothing like trusting your life to someone you just met!
Other Equipment
The items listed above are all essential climbing equipment for sport climbing outdoors. There’s obviously a lot more gear that makes climbing better, but it isn’t necessary starting out. Some examples of other things that you may want early on are climbing chalk, belay glasses, and a stick clip.
Non-Technical Gear
The list above is the essential gear that you’ll need for Sport Climbing outdoors. Aside from that gear, and a firm knowledge of how to use it, you also need to be ready for whatever you might experience in the backcountry.
There’s no heating or AC like you have in your climbing gym, there’s no vending machine or smoothie bar next door. You need to be prepared to self-rescue in the event of an accident.
Backpacks
Sure, you look really cool hiking into a crag wearing your harness and a rope bandolier with tons of hardware. Some crags aren’t as accessible though, requiring class 4 scrambling and other challenges. Keep your gear in a backpack to keep it organized and keep it protected.
Gear wears out very quickly when it is left in the sun, so do your best to keep it protected in a backpack. A good backpack is durable and has a comfortable waist and chest strap. They don’t necessarily need to be specifically designed for climbing, but those bags have certain features that help.
Because your rope is your most expensive piece of gear, you should really consider getting a rope bag. There are lots of different styles, but they all are set up so that you can stuff the rope and then lay it out on a tarp while you’re climbing. This protects the rope from sand and other abrasive materials.
Check out our recommendations for climbing backpacks and rope bags on our recommended gear page.
Backcountry Awareness
The majority of outdoor climbers already have a lot of experience in the backcountry, whether with hiking, camping, or many other activities. Others may not be very comfortable in the backcountry because you live in an urban area and learned to climb in the gym.
Many of the biggest benefits to climbing outside are centered on spending time outside, but also most of the biggest risks stem from spending time away from civilization.
If you plan to spend any time outside of urban areas in less-developed places you need to gain a healthy respect for the outdoors and an understanding of some of the bad things that can happen.
These include getting lost, getting injured, becoming stranded, and exposure to the elements. It’s important to be prepared in these situations for scenarios that are both likely and unlikely. In most areas, you should make sure you’re prepared to stay the night in the event of an emergency.
For a full list of the emergency equipment that we use and recommend, check out our Recommended Gear Page.
First Aid Kit
From simple scrapes and bumps to more serious lacerations and even broken bones, you need to be prepared to self-rescue if there is an accident. The list of what could go wrong in the outdoors is too long to include here, but a good first aid kit will have you prepared for most of it.
Simply having a first aid kit won’t save you though, you need to know how to use it. Learn basic first aid skills and practice some of the essentials before going too far off trail.
Food and Water
The amount of food and water that you need to carry with you largely depend on the remoteness of the climbing area. Some areas are visible from the parking area, while others require a long approach.
Bring enough food and water for yourself- there aren’t vending machines and no one likes you when you’re hangry. Consider getting a water purification system like a Lifestraw or Sawyer Squeeze if you frequent areas with water nearby.
Weather Forecast
Always check the weather before you head outside. Conditions change rapidly, especially high in the mountains. Be prepared for the highs and lows and any inclement weather on the forecast.
Learning to dress correctly in the outdoors can be the difference between life and death in the outdoors. A lot of this depends on the climate where you live and the season in which you’re climbing, but the principles are the same.
Avoid cotton base layers, wear lots of layers of clothing so you can adjust to the changing temperatures throughout the day, and be prepared for rain or snow.
Lightning and climbing don’t mix very well, so don’t climb if it starts raining. Climbing on wet rock can also damage certain types of rock.
For an entire post on what you should and shouldn’t wear when climbing outdoors, check out my article What to Wear Climbing Outdoors.
Map
Most climbing areas don’t follow a big wide hiking trail with nice signposts along the way. Depending on the terrain of the area, there may not even be any trail at all.
Bring along a map, and learn how to use it. Pay attention to landmarks and make sure you always know where you are, where you’re going, and where you parked.
In addition to a paper copy of a map, I always download the terrain map on the Google Maps app on my phone. Google does a very good job tracking your location, even when you don’t have any cellular service. If you do depend on a cellphone map, make sure you have an alternate power source like those listed in our emergency gear guide.
Consider getting some sort of emergency beacon that allows you to call for help in areas with no cell service. A Spot Messenger or Garmin inReach can literally save your life.
Guide Book
A guide book isn’t an absolute necessity thanks to the availability of online information like Mountain Project, but it can really help. Guide Books tell you where the best routes are, the best approach, and which specific gear is needed.
They’re always written by other climbers, so you know that you’re supporting someone who is living the dream. You can pick them up at local outdoors shops or REI.
Types of Outdoor Climbing
This article focuses on what is needed for sport climbing, though there are lots of different types of outdoors climbing. Sport climbing is the most practiced type of climbing outdoors, and is an excellent starting point to eventually branch off into other kinds of climbing. Here’s a brief explanation of the types of outdoor climbing.
Sport Climbing
With sport climbing, climbers scale a rock unassisted. They use quick draws to prevent injury and capture progress, but climb unaided. Quick draws are clipped into permanent bolts on the wall. Sport climbing is often referred to as Lead Climbing, though leading a trad route could also be called lead climbing.
Top Rope Climbing
Most gym climbing is top rope climbing. This is when the rope goes up from the belayer to the anchor at the top and back down to the climber. The risks are low, and the climbing is easier. For more information on top rope climbing, read my article What is Top Rope Climbing?
Trad Climbing
As opposed to sport climbing, traditional climbing (trad) involves placing gear into cracks on the wall instead of using permanent bolts.
Trad climbing is a lot more technically-intensive and requires a lot more gear. A trad rack of nuts and cams can cost more than $1000. Most climbers start out sport climbing and stick with it, but some live for the heightened risks and rewards of trad climbing.
Bouldering
The nice thing about bouldering indoors is that the only thing you need is a good pair of shoes. Outdoors, however, you need to get a crash pad. Bouldering pads cost about as much as a rope, though they can last a lot longer if taken care of.
Other Types of Outdoor Climbing

Multi-pitch Climbing
A lot of walls are longer than your rope. To scale these climbers have to use a few additional techniques in order to link pitches. This can be done as any type of roped climbing- sport, trad, ice, or aid.
Ice Climbing
Ice climbing isn’t very common where I live in Arizona, but it is huge in other parts of the United States and the world. Similar to trad climbing, climbers place gear into the ice as they ascend. In this case, they place screws into the ice instead of nuts and cams into rock.
Ice climbing is a lot more dangerous than other types of climbing because of the nature of the ice. A lot of specialized and expensive gear is required to get into ice climbing, as well as a good insurance policy.
Aid Climbing
A hundred years ago all climbing was aid climbing. Now, it is very rare and only practiced on big walls in places like Yosemite National Park. Most climbers have no experience with aid climbing.
With aid climbing, climbers use hooks and ladders (etriers) to ascend portions of rock wall that would otherwise be impassible. The additional gear needed for aid climbing is very specialized. For more information, read my article The History of Rock Climbing.
Free Soloing
Made famous to the outside world by Alex Honnold’s ascent of Freerider on El Capitan and its accompanying Oscar-winning film Free Solo, free soloing is climbing without ropes. It is very uncommon (for obvious reasons), but only requires a pair of climbing shoes.
Deep Water Soloing
DWS, or Psicobloc (as it’s known in Europe), is ropeless climbing over water. It can be done with no gear at all, though you need climbing shoes and liquid chalk in order to send anything substantial. It is gaining in popularity, but is still relatively unknown.