
When I was about 14 years old, I told my dad that we needed to build a climbing wall up the side of our 2-story house. I walked him outside and pointed out the wall where I wanted it, and explained that he only needed to buy plastic holds and bolts. I was confident that he would get some hardware on order, and we’d have a climbing wall up in a week. He probably never really looked into building a do-it-yourself climbing wall, but I sort of blame him for me not being a professional climber today! Cost may have been an inhibitor to the project, or maybe the HOA (more likely).
How much does a DIY Climbing Wall Cost?
A DIY climbing wall can cost anywhere from around $200 to thousands of dollars! The sky is the limit, depending on the amount of space you have, the target audience for your project, and the permanence of your wall. Projects vary from small bouldering projects in apartments, attics, and basements, to free-standing backyard towers complete with auto-belay systems! Some important factors to consider are the height, the target age group (kids or adults), and the location.
If you are interested in checking out the best climbing holds online, click here .
.
What Options do I have?
A lot of professional companies and shops will build a wall for you, but you will definitely pay a lot more than you would by doing it yourself. Some companies come survey your space, design a wall, and even complete the installation for you. Other companies sell kits for you to do it yourself, ranging from bolted boards to synthetic rock faces, or you can just buy the designs.
We’ll take a look at each component and the options that are available to you:
Design-
- Google Sketchup: $0
You can use Sketchup, a free 3D Design tool by Google, to mock up some plans for your area. Watch a few Youtube videos to learn how to use the software, and you’re good to go! Climbing walls can either be free-standing or secured to a wall. Most people choose free-standing walls because of the ease of installation and the lack of permanence. If you decide to do a free-standing wall with an angle or overhang, you will need to add support pillars coming from the front, top edge down to the ground.
Alternatively, you can buy completed plans from a number of different companies that will tell you exactly what to buy and how to assemble the pieces.
Wood-
- ACX Plywood: $2-$4 per square foot
- 2×4 or 2×8 studs: $4 or $9 each
Most homemade climbing walls are made from wood, though there are other options like cement. You’ll want to use at least 3/4″ thick wood (ACX or CSX plywood to save on cost. Don’t just get regular plywood or the holds will rip through.). If you’re building an outdoor wall, you’ll need to weatherproof the wood with some sort of sealant like polyurethane.
The frame should be made from 2 inch thick studs- a strictly vertical wall can use 2×4’s, but anything on an overhang should be at least 2×8. The studs should be spaced between 16 and 24 inches apart. Again, the amount of wood required depends on the dimensions of your specific wall. You’ll also need a 2×4 to go across the top and the bottom. The plywood can be painted to add an additional level of protection, as well as to improve the aesthetic appeal.
If this sounds like too much work, several companies sell kits with varying sizes of boards that come with the T-nuts included. It will increase the cost of the project a little bit, but it may save a lot of headache. They also have options that include irregular surfaces to add more fun.
Hardware-
- Wood Screws: $7 per pack
- Joints: $1 each
Securing everything together will take 2-3 regular boxes of wood screws. It can be done with just screws, but adding some plates or connectors will increase the strength (and safety) of the joints. The screws will also be used to secure the plywood to the studs, with screws about 6 inches apart around the entire frame.
If you plan on just leaning your wall against another wall and only doing a single panel wall, you won’t need this.
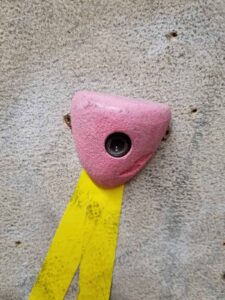
Bolts and T-nuts-
- 200 T-nuts per panel: $30
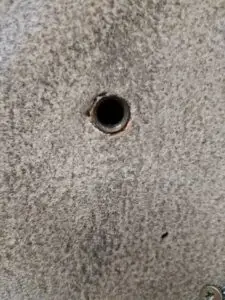
Before you secure the plywood paneling to the support frame, it’s time to drill holes for the T-nuts. Pencil in where the frame will match up and be sure to avoid drilling where the studs are. Use a 1/2″ drill to space holes 6-8 inches apart. They can either follow a grid pattern or just be spaced randomly. A 4×8′ sheet will house between 150 and 250 T-nuts. Most climbing holds come with bolts & T-nuts included- but take care to check before you purchase them. You will want to have more T-nuts than holds so you can rearrange the setup and create new walls.
Many sets of holds come with hardware, which will further reduce your cost. If you’re buying the holds and hardware separately, make sure they’re compatible.
Climbing Holds-
- 25-40 holds per panel: $1-$2 per hold
This is the most important part, and definitely the most fun! Holds come in all shapes and sizes. Order some on Amazon, or look for a local manufacturer to buy from. Look for a package with several different kinds of holds. Some companies sell holds specifically designed for kids, but most are for adults (and they work for everyone). Most walls have between 25 and 40 holds on each 8×4 panel, and that will change with different configurations. Just like at the climbing gym, use tape to designate specific problems and ratings. With multiple marked problems, you can essentially have holds in every one of the T-nuts.
This set from Amazon comes with the hardware and enough for a small wall. I like that the holds aren’t big goofy easy holds.
Amazon: Atomik Climbing Holds 21pc
Fall Zone-
- 2-4 Old mattresses
Falling even three to five feet onto carpet or cement will cause some pretty serious bone-jarring bruises. Fortunately, there are several different cheap options for padding underneath your wall. You can store your crash pad underneath your new wall (if indoors). Any thickness will work for a short wall. If you don’t have a crash pad, use some old mattresses to cushion the blow. One will take the edge off of a fall, but you’ll still feel the ground. Two will suffice. Hit some garage sales or check out local for sale groups- you can usually pick them up for free.
As with everything else listed so far, lots of companies make bouldering pads to outfit any climbing wall you can dream up.
Other Options-
One of the coolest non-traditional climbing walls I’ve been on is at Upper Limits climbing gym in Bloomington, Illinois. I lived in a nearby city one summer for an internship, and was desperate to climb something, anything! That sense of desperation was probably similar to what the owners of the climbing gym felt right before they started their venture. Upper Limits is built inside of a handful of cement grain silos. I think the family that started it looked around town for the tallest structure, and then just bolted it! Cement was a little bit weird to climb on- not quite as grippy on your shoes as most artificial climbing walls, which lead to more skinned knees. All in all, they were incredible, and I would recommend bolting an old grain silo if you happen to have one in your backyard!
One of the coolest things I would like to see is a DIY Deep Water Soloing (psicobloc) wall over a swimming pool. If I ever own a home with a pool, you can bet that will be at the top of my list of projects!
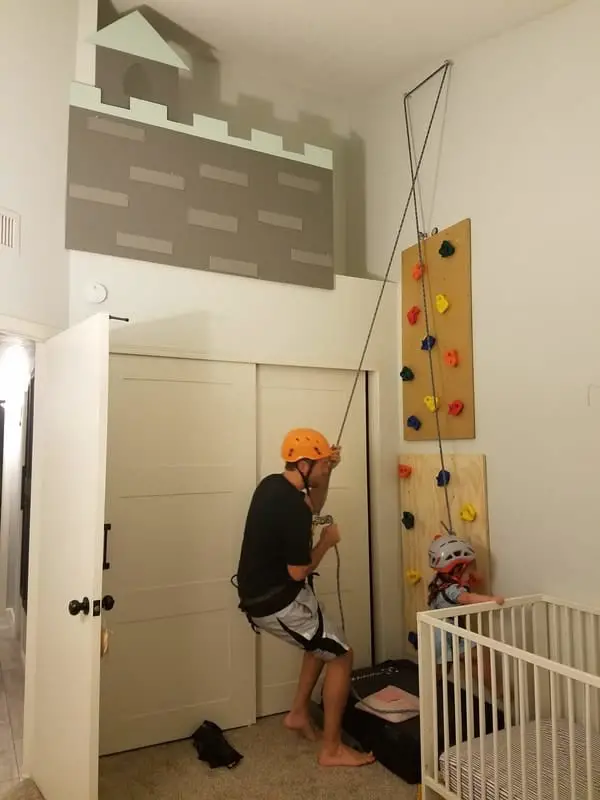
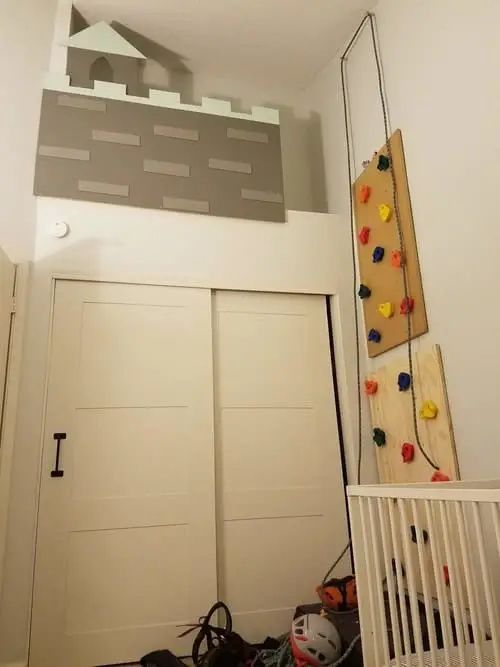
My DIY Climbing Wall for Kids
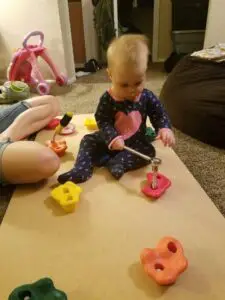
My brother gave us some climbing holds as a Christmas gift last year, and we built a small wall for my then 8-month old daughter. She had been pulling herself up on everything for a long time, and I wanted to encourage that! The climbing holds we got are awesome for kids, with big grips that work for hands and feet, and come in a variety of shapes and colors. The installation was really simple as well, which was a plus since I don’t have a lot of tools right now.
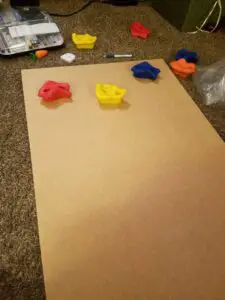
I went to Home Depot and looked at all of the different wood they had, and ended up buying a 3/4″ thick piece of fiberboard. It’s smooth to the touch, and durable enough for a kid. It was around $15, which is a lot cheaper than a lot of the solid woods.
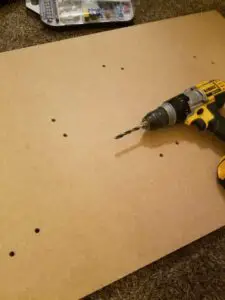
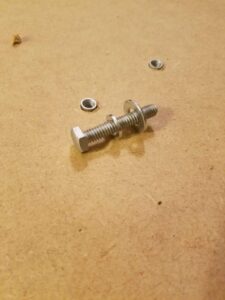
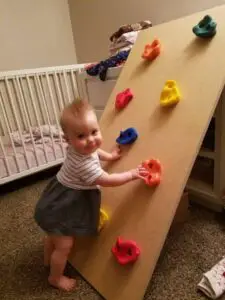
The first step is to lay out the holds on the board and pencil in where you want them to go. Next you have to drill holes into each of the places you marked. The kit I bought came with a drill bit the perfect size, but most directions will tell you what size to use. My next step was to assemble the hardware. This kit didn’t have standard T-nuts that have to be hammered in, which was nice. The assembly was simple, and we finished in a few minutes. The last step was to actually bolt the holds to the climbing wall using a ratchet and socket set. My daughter even helped with that (sort of)! We’ve adjusted the incline of the wall as she’s gotten older, and she loves climbing. The next step is the Olympics!
Amazon: Pro-Hold Climbing Holds (10pc)
Home Depot: Medium Density Fiberboard
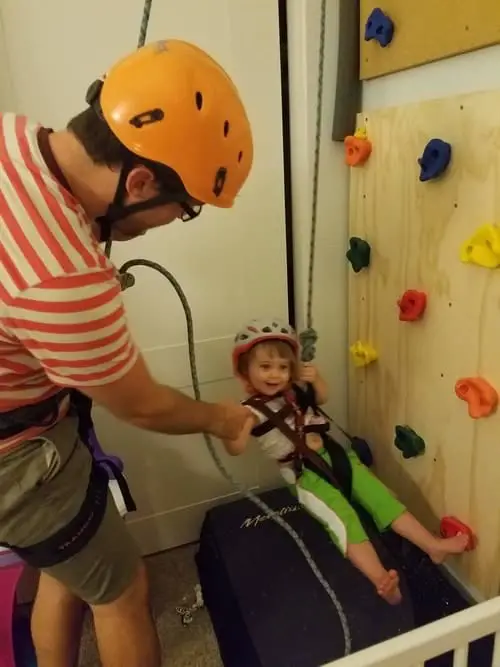
As my daughter has grown, I’ve since added a second board to the wall, and bolted them to the wall. I even added a couple of eye bolts up near the top of the vaulted ceiling so she can learn to trust a rope and start top rope climbing. One day we’ll add some bolt hangars along the way, and she’ll get some practice leading. For now though, she’s 2.
Whether you live in an apartment and need a free-standing, easily taken apart bouldering wall, or you have a spacious backyard and ambitions to construct a climbing tower, now is the time to begin! There are lots of resources with ideas and plans out there, and costs are all over the board. Mock up some drawings and get to work!
What project do you have in mind? Let us know!
See Also:
How Much Are Rock Climbing Shoes?
