
First, it should be noted that the majority of climbing accidents happen during the rappel. Rappelling (abseiling) is inherently dangerous, and you need to exercise extreme caution when participating. Double check all of your knots, and confirm the sturdiness of the anchor. That being said, there are several really cool alternative ways to rappel, including the Australian Rappel.
An Australian Rappel looks like it came right out of a movie (and should probably stay there!). The rappeler hurdles towards the ground at breakneck speed, stopping just in time. Popularized by the Australian army, the Australian Rappel theoretically allows soldiers to self-belay with one hand while using a gun to shoot below them in the other.
Imagine Green Berets or SWAT Teams jumping from helicopters or sliding down the sides of buildings. I’ve never needed to rappel with a gun, but I still completely enjoy an occasional Australian Rappel.
See Also: Top 10 Rappelling Accidents
How to do an Australian Rappel
There are three ways to rig the Aussie rappel. For the easiest option, rappel like you would normally-just face downhill. The most common option requires you to wear your harness backwards and tie in how you normally would, but use the opposite hand as a braking hand. The third way is with a harness specifically designed with load-bearing straps in the back and an extension on the belay device. Read ahead for more details about how to perform each rappel. We’ll also look at a few other cool rappelling tricks including inverted rappelling, simultaneous rappelling, and waterfall rappelling.
The Risks:
Australian-style rappelling (geneva-style abseiling) is outright hated by most climbing groups, mainly because the climbing community hyper-focuses on safety. In an industry that most of the world already considers reckless and dangerous, it’s no wonder climbers dislike adding any extra risk.
Should you try an Aussie rappel out at the crag, onlookers will definitely shake their heads, and at least one person will come up and attempt to talk you out of it. Although certainly more dangerous than regular rappels, they don’t deserve the negative stigma they currently have. Here are a few safety tips:
- Beware of loose clothing- With the belay device and rope in irregular areas, clothing and long hair that would normally not get caught could get snagged.
- Triple-check your rigging- More often than not, ropes will get twisted around and you will need a friend’s help getting set up. Always check, double-check, and triple-check that the knots sit right and the rigging runs smooth, especially when someone else sets you up. Test the flow before going over the edge.
- Use a belay- Have a friend wait at the bottom to do a fireman’s belay in case anything happens. At a higher velocity, the chance of losing hold of the rope or tripping increases.
See Also: How to Backup A Rappel
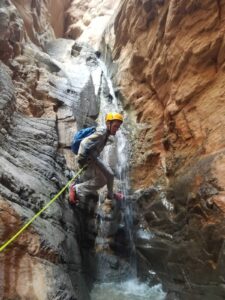
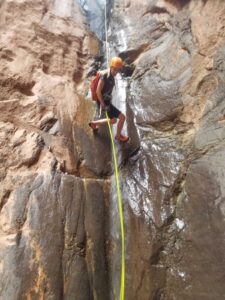
Method #1
The easiest way to rappel Australian-style is to set up a regular rappel and rotate your body 90-180 degrees and begin your descent. Brake the same way you would in a normal rappel by bringing your downhill hand up around your body. Use an 8-ring or an ATC as a rappel device. As mentioned above, beware loose clothing. You can learn how to rappel with these devices by reading these articles- 8-ring or ATC.
Rappelling sideways places the belay device in a somewhat awkward position and your shirt can get snagged in the rope. The advantages of this method of Australian Rappel are the simple and familiar setup, and the ability to return to normal position if things get out of hand. Again, use a fireman’s belay at the bottom in case things go awry. This is a great way to taste the high velocity and exhilarating descent for the first time!
Method #2
The most practiced form of Aussie rappelling is to put your harness on backwards. Brake with one hand on the downhill side of the rope, pulling it across your chest. The main concern people have with this method is that the harness isn’t designed to be worn this way. Should you completely lose control and need the belayer to stop you, a jerk on the static line will arch your back and body the wrong way. This could potentially cause an injury.
Again, be careful! Some people wear the harness normally, and clip a carabiner and belay device on the back of the waist strap on the harness. I don’t like this way as much because the waist strap isn’t designed to hold loads, but it’s probably strong enough. Probably.
The best thing about this method is that it can be done with only one hand, and no additional gear. The rope and belay device go through the proper areas on the harness. Again, with the rigging behind your back you probably need a partner to tie you in- check and double-check that he or she knows what needs to happen.
Method #3
The third way to do an Australian Rappel is the way it is actually done by military groups. Special harnesses like this CMC Rescue Harness have multiple load-bearing loops. They usually add a short sling with a belay device to a carabiner. Then they connect it to a load-bearing strap on the back of the harness.
With an extension to the belay device, the rappeler can set up his/her own rappel. This lessens the risk of setting up rappels incorrectly. The extension also significantly reduces the risk of long hair or loose clothing getting caught in the rappel. The rappeler holds the line in the brake hand, and stops by pulling it across his/her chest.
The reason military groups train to rappel Aussie-style is so they can have a weapon in one arm trained on the ground while descending. The actual application probably isn’t very frequent, but I can imagine it’s a lot of fun to train.
Rappelling Upside Down:
You can practice inverted rappelling on overhanging faces. Start descending normally, but once off the cliff and free-hanging, swing your legs up and your head down. This works best with your belay point a little higher up on your body, such as with a caving harness.
The main risks include falling out of your harness (keep it tight!) or blood rushing to your head and passing out. Rappelling face first means that the first thing to smash the ground will be your face if anything goes wrong, so definitely use a belayer for this style of rappel! Onlookers will love it- a free trip to the circus!

Simultaneous Rappelling:
For a fun, though not very useful, rappelling technique try simultaneous (simul or tandem) rappelling. Two rappellers balance each others’ weight by rappelling each side of the line. Use a strong anchor (learn to make one here) that can hold two people at once, and make sure both ends of the rope touch the ground.
Tie a stop in both ends of the rope! Don’t forget to untie them before pulling the rope though. Getting started takes practice, as you both need to weight the rope at the same time.
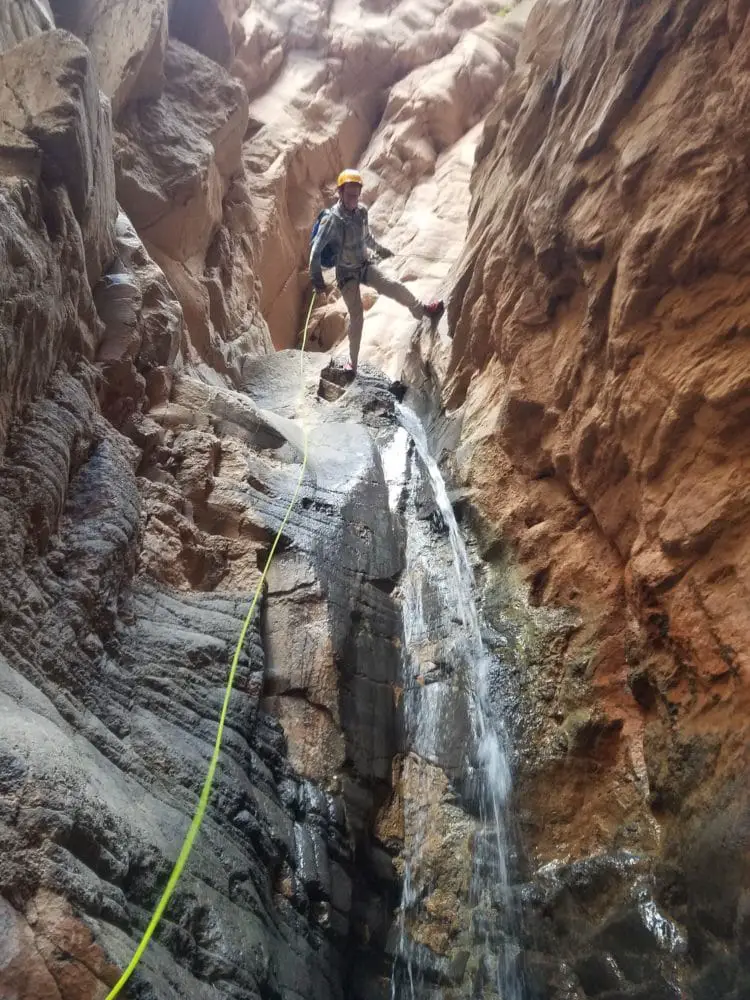
Waterfall Rappelling:
This is guaranteed to make anyone’s top-ten list. Hundreds of gallons of water crash down into your face from above as you struggle to keep your footing while lowering down mossy cliff face. Hikers stare in admiration, their jaws dropping and cameras flashing. A few brave souls may ask if they can try it too!
Rig a rappel to a tree, or other fixed anchor. Clear the area where the rope goes over the edge of any rocks, boulders, or logs that may get jostled. The last thing you want is a rock to come over the edge and smash into your helmet or arms while you’re in the middle of a waterfall rappel! Have a spotter at the top who can drop another rescue line if you get into trouble, and definitely have a belayer set up at the bottom.
Wear a climbing helmet! It helps keep your eyes clear of the barrage of water, and will help if any rocks do come over the edge. Do not use any sort of auto/self belay (e.g. Prusik). If you get stuck in the middle of the falls, you could drown.
If rappelling into water, do not to tie a knot in the end of the rope. The easiest way off of the line is to slide off the end. That way you avoid the risk of dropping your belay device.
Suit up, and give it a try!
If you’re bored of regular rappelling, or just looking for new ways to inject adrenaline into your life, try these different rappelling techniques. You’ll need to take extra care, as these methods definitely involve more risk and danger than standard rappelling.
Are there any crazy forms of rappelling we missed?
See Also:
What is the Difference Between Canyoneering vs Canyoning?