
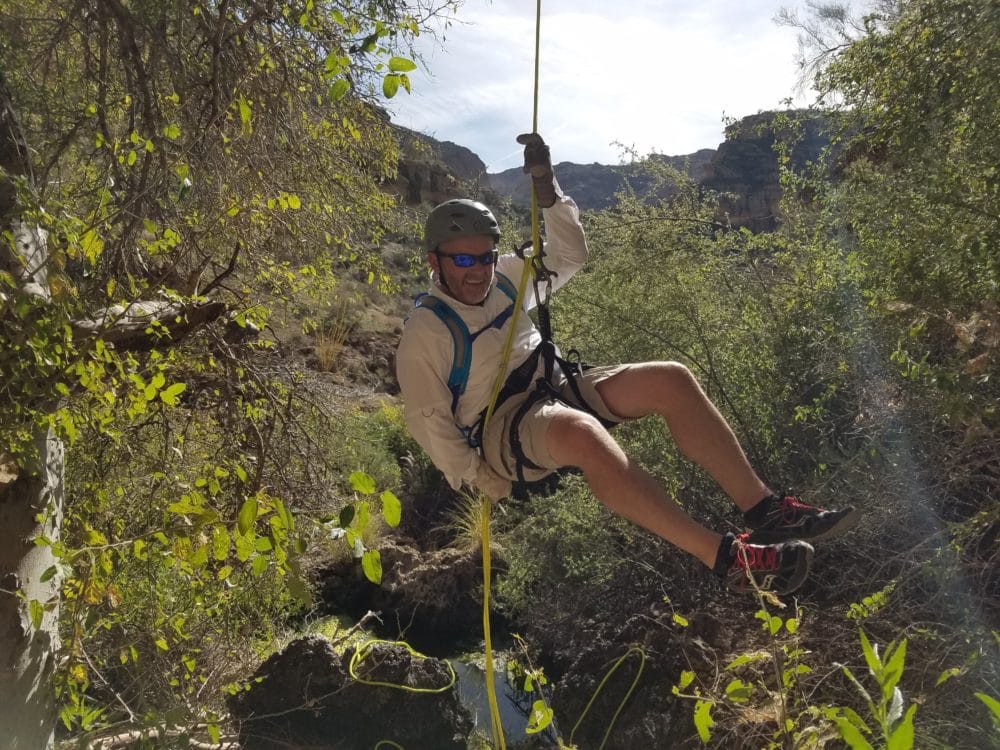
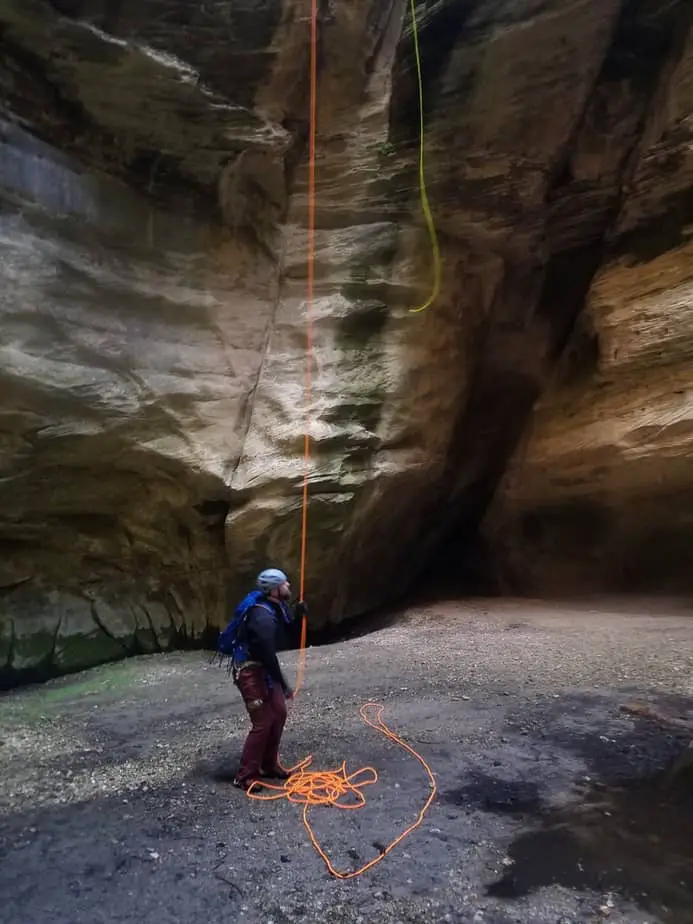
When exploring a canyon for the first time, groups generally have to rig each rappel with a fixed line and leave the ropes behind in case they have to bail. Once they’ve mapped out the number and length of the rappels, they know what gear they need, and specifically how much rope. Subsequent groups of canyoneers will rig each rappel as a retrievable rappel, pulling each rope down so they can use it later. What at first seems impossible- rappelling down a rope and then tugging on it to get it free- is easily accomplished through several techniques presented in this article.
This article discusses multiple ways of executing a retrievable rappel, including the toss ‘n go method and different kinds of rope blocks, as well as others. I also provide some guidance on setting up a retrievable anchor when ghosting a canyon. While this is written specific to canyoneering (see: What is Canyoneering? ), the principles can be easily used for rappelling and rock climbing as well.
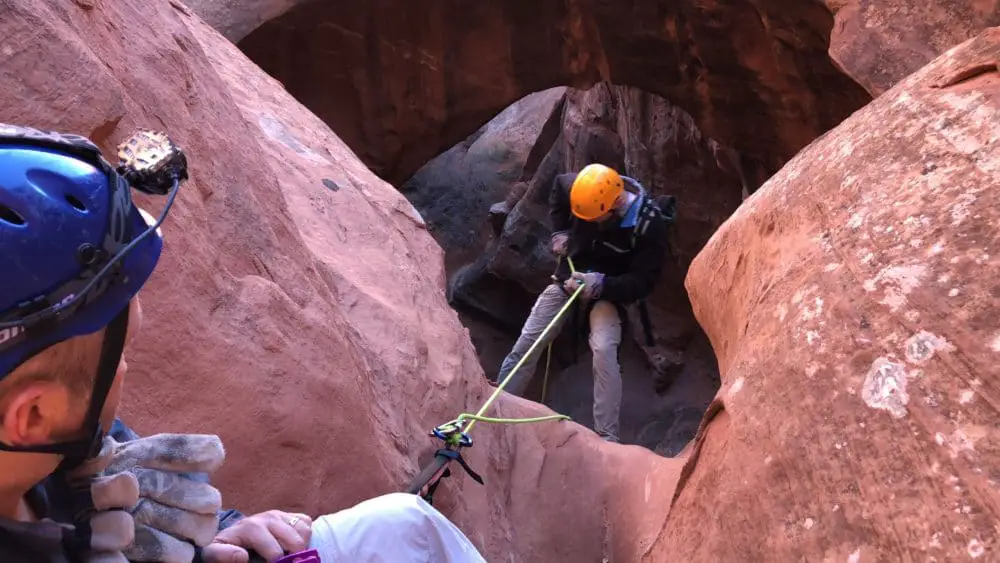
A quick safety note- The preferable way to do all of these rappels is by applying the principle of LAMAR (Last Man at Risk). This basically means that everyone should rappel using the safest possible method, tied into one strand with the rope securely fastened to the anchor. Then, once all but the last person (or pair, to check each other’s work) have rappelled, the last person adjusts the system rigging for a retrievable rope and descends. The purpose of LAMAR is to further reduce any additional risks caused by these retrievable rappelling techniques.
These methods are all safe when practiced properly- but it’s hard to beat the safety of a fixed line.
If you are interested in checking out the best descender for rappelling, click here.
Retrievable Rope Rappel
There are several really good methods for setting up a retrievable rope rappel, and several that are sketchy at best. Each has its own limitations, and situations where it works really well. It’s important for canyoneers to understand the different methods and when they should be used.
How to set up a Retrievable Rope Rappel
- Toss ‘n Go Method
- Simul Rappel
- Rope Blocks
- Pull Cord
- Fiddlestick
- Macrame Knot
Toss ‘n Go
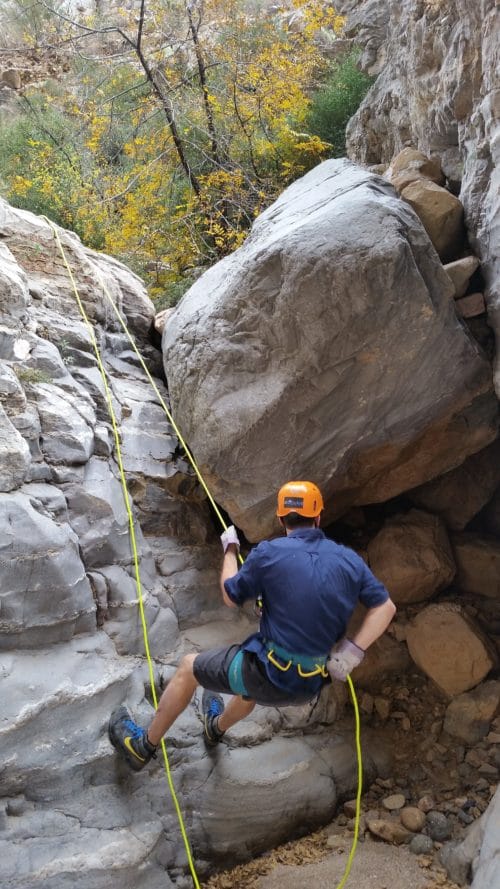
The easiest way to rig a rappel is just to find the middle of the rope (easy if you buy one with a middle mark or do it yourself) and thread it through the quick link (rapide link). Throw both ends of the rope over the edge of the cliff one at a time, making sure they hit the ground. Tie into your rappel to descend both strands of the rope, and you’re off!
The Toss ‘n Go method works really well for shorter rappels, and rappels where your rope is at least twice as long as the descent. If the rappel is 110ft (35m) and you have a 200ft (60m) rope, you can’t use this method! In this situation, you would drop off the end of the rappel (use a stopper knot!) and need to call Search & Rescue.
This technique is nice because it is really fast to set up (as long as the anchor uses quick links instead of rap rings) and fast to rappel. To pull the rope, you just tug on either side from the bottom and pull it through. There’s little chance of it getting snagged because there’s no additional hardware or knots.

There are several downsides to this method, however. You generally have to use the entire length of the rope, even for shorter rappels. This means packing it all back into your rope bag, which can be a pain. If someone runs into a problem halfway down the cliff, there’s no easy way to perform a rescue because the rappeler is already using both strands of the rope. With other techniques like a rope block, everyone can rappel one strand. If someone runs into trouble, someone at the top can tie off the rappel and go down to help out.
Another point to note is that you have to use quick links instead of rappel rings unless you want to thread the whole rope through the ring. That’s one of the disadvantages to rappel rings, but there are several advantages too. I wrote about Rappel Rings in this article.
The Toss ‘n Go method is very common, and very popular because it is so easy to set up. It can be done with no knowledge of knots. I usually use it for at least one rappel in each canyon because of its quickness, but using a rope block is a little bit safer for a few reasons.
Simul Rappel
Another method of the toss ‘n go method is the Simultaneous Rappel. A simul rappel is set up for speed, with two people rappelling at the same time. This shouldn’t be used all the time- especially not by inexperienced canyoneers- but it is a fun method to use sometimes.

How to set up a simul rappel:
To execute a Simul Rappel, tie a stopper knot in both ends of the rope and thread the middle through the quick link. Each rappeller clips into opposite sides of the rope (on each side of the quick link), and they step back…simultaneously. Their weights balance each other out, and they can descend at the same time.
For more information on the Simul Rappel, as well as other variations on a traditional rappel, check out our article on the Aussie Rappel.
Obviously, there’s a lot of added risk with a Simul Rappel. There’s often no belay, which means you will likely fall if you let go. Consider using a rappel backup like the ones explained in this article.
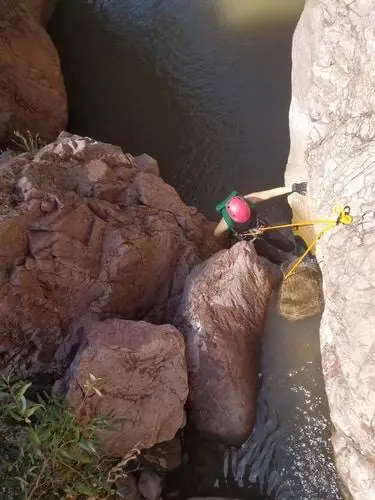
Rope Blocks
Setting up a rope block means rigging the rappel with a large object on one side of the quick link that acts as a stop or block so that the rappeler can descend the other side of the rope safely. The idea is that the larger object can’t pass through the quick link, which makes it so the other side of the rope can bear weight.
Using a rope block is really nice because you can easily control how much rope you let out. If rappelling into water, it’s far easier to just rappel off of the end of the rope than to fumble with hardware and try to disconnect while treading water underneath a waterfall (check out how to rappel “canyon mode” with an 8 ring).
With a rope block you can let out as much or as little rope as you want and block it off. You can keep the rest of a long rope in your pack, only having to stuff the end back in after a short rappel, which saves time and energy.
Another advantage to the rope block is that it facilitates rescue. If a rappeler runs into trouble as he or she descends (hair or loose clothing gets caught, rock fall, etc.), then the person at the top can easily fix the other end of the rope to the anchor and lower down to assist. In the traditional toss ‘n go method, there’s not really any good way for someone at the top to come down and help out. Using a rope block can help avoid the risk of many of the most common rappelling accidents.
A rope block is a little more difficult to set up than a standard toss ‘n go, which increases the opportunity for error. Occasionally, especially with a knot block, the block gets pressed so tightly into the quick link that it becomes stuck and you can’t pull it. The last person should test for this by tugging on the block to make sure it moves before rappelling over the edge.
Another risk of using a rope block is that the 8 ring, carabiner, or knot could get stuck as you try to pull it. Beware cracks, or other features that could potentially swallow your rope.
Leave the side of the rope with the block on it on top of the cliff or in the bag until the last person is ready to rappel. This mitigates the risk of someone clipping into the wrong strand of rope. The only downside is that if the last person forgets to toss the rope, there’s no way to retrieve it from the bottom! Someone will have to ascend back to the top and toss the other strand before coming back down. Fortunately, the block makes it so you can ascend fairly easily.
Tips to avoid danger:
- Wait to toss the side of the rope with the block on it until the last person is ready to rappel. This minimizes the risk of someone rappelling off of the wrong side (and plunging to their death).
- Clip a Carabiner, or Quickdraw if you have it, from the block to the other side of the quick link. That way, if someone were to clip into the wrong side, the carabiner would act as a block on the other side preventing them from falling.
There are several ways to block the rope, including an 8 block, a biner block, or a knot block. I’ll talk about the pros and cons of each one in more detail below.

8 Ring Block
An 8 ring is one of my favorite pieces of hardware for canyoneering. You can do pretty much anything with it. 8 rings make for smooth rappelling of a rope of any size, allow for variable speed settings, and can even belay a climber if needed. The other great thing that 8 rings do is set up a perfect rope block for rappelling.
How to set up an 8 block retrievable rappel:
Set up an 8 Block just like any other rope block, with enough rope let out to reach the ground on both sides and wait to throw the blocked side until the last person rappels. To rig an 8 Block, pinch a bight of rope through the large ring and wrap it around the neck. Rotate the 8 ring and do the same thing, threading a bight of rope back through the large ring and around the neck. Pull tight on the rope on both sides of the 8 block to make sure it doesn’t slide back through. Clip a carabiner or quick draw through the 8 block to set up the safety.
When the last person rappels, unclip the safety. I always keep a carabiner clipped through the 8 and around the rope on the side you don’t rappel on. That way if the 8 becomes disengaged, you won’t lose it. Wear a climbing helmet, because when the 8 comes down it will hurt!
Carabiner Block (Biner Block)
Even if you don’t have an extra 8 ring, you should have an extra carabiner in with your hardware kit. It’s always better to have an extra carabiner with you in case you drop something. You can rappel with it if necessary, and they’re really useful in rescue situations.
How to set up a carabiner block retrievable rappel:
A biner block uses the back of the carabiner as the block, rather than an 8 ring or knot. The best knot to use is a simple clove hitch- this will keep the rope from sliding and the weight against the other side of the rapide will keep it tight.
The biggest advantage to using a biner block is that you always have an extra carabiner around, it won’t get caught or stuck in the quick link, and you can use the extra carabiner for other purposes.
Knot Block
This is the least desirable rope block, but a need-to-know in case you lose other gear. The premise is that instead of using extra hardware, you just tie a knot as the block on the side of the rope with the pull. Canyoneers use a few different knots to set up a knot block, and it may depend on the situation which one is best. There’s no standard size of quick link, so you may encounter a large quick link that would allow your regular knot to pass through or get wedged inside.
How to set up a Knot Block retrievable rappel:
It’s most common to use either a butterfly knot or a figure 8 knot. When I’ve had to set up a knot block in the past, I use the figure 8 knot. It’s something I’m very comfortable with because of rock climbing, and I know it works. The figure 8 also creates a loop that can be clipped to the anchor as a safety for the first rappellers (again, if you have an extra carabiner, just set up a biner block!).
The downside to a knot block, and the biggest risk, is that the pliable knot could be pulled either all of the way through the rapide or part way through. This would cause a fall, or at least make the retrieval of the rope difficult or impossible. Before the last person rappels, he or she needs to test the knot again and make sure it isn’t wedged into the quick link. It’s also helpful to send heavier people down first to make sure the knot won’t stick.
Pull Cord
A pull cord is pretty much always used in conjunction with a rope block. As mentioned above, the rope has to be at least twice as long as the length of the rappel in order to retrieve it at the bottom. If the rope is too short, then the person rappelling will have a problem! A pull cord is a great way to artificially extend the length of your rope for specific canyons with longer than average rappels.
A pull cord is usually quite a bit thinner than your regular static rope, which saves on cost as well as weight. I recommend a 6mm pull cord, though you could go thinner if you really want to. Keep in mind that thinner ropes are more likely to get severed by sharp rocks or ledges.
Because the pull cord is thinner than the static rappelling rope, you need to use specific knots to tie them together. My knot of choice for this method is aptly named the “European Death Knot.” I tried to do some research, and couldn’t find a reason for the name. It always makes for a fun time when I tell the groups I’m guiding that I’m tying the European Death Knot! I also like to take it in my hands after tying it and say ‘hmmm it looked different last time, but oh well.’
How to set up a pull cord retrievable rappel:
The knot is very easy to tie, and easy to remember. Simply take one end of each of the ropes, line them up parallel to each other and then tie an overhand knot using both strands. The knot lies flat, which reduces the risk of it getting stuck, and will hold tight even with different thicknesses of ropes.
To rig a pull cord, lower one side of the rappel rope (with a stopper knot) so that it touches the ground and thread it through the quick link at the top. Set up a rope block on the other side of the quick link and set up the safety, fixing the rope block to the anchor. Take the end of the rope that is too short to touch the ground, and tie it to the pull cord using the European Death Knot.
Wait to toss remainder of the rappel rope and pull cord over the edge until the last person is ready to rappel, then remove the safety and toss the line. Have someone at the bottom do a test pull of 5-10 feet (3 meters) to make sure it isn’t stuck, and so you can guide the rope away from any potential rope-swallowing cracks. Rappel down, untie the stopper knot in the end, and then pull the pull cord and rappel rope all of the way through.
The main advantages to using a pull cord are that you can don’t have to carry an expensive longer rope through canyons with shorter rappels, and that the pull cord saves weight and space in your pack. The only real downside is the risk of the binding knot being caught on the pull.
The only added risk would be if someone accidentally tried to rappel down the wrong line, or if the rope got stuck on the pull. The risk of rappelling the wrong line is mitigated by waiting to toss it until all of the others have already gone. The risk of the rope getting stuck is lowered by using the correct knot and by checking the flow of the pull prior to rappelling.
Fiddlestick
Another method of retrievable rope canyoneering similar to the pull cord is using something called a fiddlestick. In a nutshell, the pull cord attaches to a stick that holds the rope in place. Once the last person reaches the bottom, you can pull on the cord and the system comes apart and the rope falls. The advantage to using a Fiddlestick is that you can use an even lighter pull cord; however, it requires a more complicated set up. People use all kinds of different things for Fiddlesticks, from wood to PVC pipe, but there are a few commercially available. I won’t show how to tie up a Fiddlestick because the setup is so finicky and I think a basic pull cord with a rope block is safer and more reliable; however you can find information on the setup in lots of other places.
Bluu Gnome has perfected the Fiddlestick with what they call the “Smooth Operator.”
Macrame Knot
I include the Macrame knot in this article because it is used sometimes as a retrievable rope technique, but I think it is a little bit more risky than other methods like a rope block. The foundation of the knot is to almost braid it for a few inches, and then pull it tight. I won’t show how to set this one up either.
How to Set up a Retrievable Anchor
The idea with retrievable anchors is to “Ghost” a canyon. This is the ultimate ‘Leave No Trace’ experience for those who want a transcendent experience. It’s also fairly common by those who are looking to save a buck and not leave gear behind.
Many popular canyons, especially those in Zion or other places in Southern Utah, have very established anchors. A lot of them have been bolted, and those that rely on natural anchors are run frequently enough that you probably won’t have to replace any webbing. That being said, you definitely need to know how to set up an anchor.
We’ve all come upon a spider web of webbing (pun intended) with all the colors of the rainbow streaming off of it, sun faded and scuffed up. I don’t mind using webbing as needed, but sometimes these turn into a rat’s nest if they aren’t cleaned up periodically.
Why not forego leaving gear behind and just set up a retrievable anchor?
2 Ring Retrievable Anchor
The easiest, and by far the most widely used retrievable anchor is the 2 Ring Retrievable Anchor. Rather than tying a loop around the tree or rock, tie each end of the webbing with a water knot on a bight to a quick link. Loop it around the natural anchor and then thread the rappel rope through both quick links.
How to set up a 2 ring retrievable anchor:
If the rappel rope is long enough for both ends to reach the ground, tie a figure 8 on a bight or other rope block in between the two different quick links. Rappel both strands, or set up another rope block and rappel single stranded. At the bottom you can pull either side of the rope and the block in between the quick links will pull the anchor apart and bring it down to you.
If the rappel rope is not long enough for both ends to reach the ground, set it up with a pull cord. Rig the rappel as shown above, with a rope block on one side, but rather than tying the pull cord to the rappel rope, tie it to the anchor (either tightly around the webbing or just into the quick link). The pull cord should be on the same side of the system as the rope block. After rappelling down, pull on the pull cord connected to the anchor and it will bring the whole system down.
It needs to be noted that a 2 Ring Retrievable anchor will not work in every situation. This tactic works exceptionally well when threading the rope around trees with smooth trunks, and some rocks; however, there’s a lot higher likelihood that the webbing, quick link, or rope will get wedged around something and get stuck. As when using a pull cord, look around carefully from the top to avoid any possible snag. If your rope gets hung up, you’re toast!
Why Not to Use a Retrievable Anchor?
One commonly ignored result of using a 2 Ring Retrievable anchor is the significantly higher amount of rope drag. Sandstone canyons tend to see the brunt of it, where ropes and anchor systems quickly carve lines into the soft rock- just as the water has been doing for thousands of years. Pulling an anchor and rope around a tree can completely strip the bark and do irreparable damage. In areas where trees aren’t found in abundance, this should be avoided. If the idea is to leave no trace by not leaving webbing behind, then I believe that leaving scars in the rock is even worse.
Heads Up!
Be very careful pulling ropes- especially when there’s hardware attached. Everyone at the bottom should always be wearing a helmet, as even a falling rope will cause a lot of pain. You don’t want a head injury in the middle of a canyon!
Sand Trap
This technique is a lot more complicated and advanced than many others here, and should only be set up and used by experts. I include it because it is one of the best retrievable anchors. The idea for a sand trap began as just a tarp, but quickly morphed into what it is today, with additional straps allowing it to work better and in more variable situations.
How to use a sand trap retrievable anchor:
The basic idea is similar to setting up a dead man anchor (where you bury a smaller object that wouldn’t normally hold you). Lay out the sand trap so it maximizes friction and takes advantage of any lip near the drop, and then fill it with sand. The rectangular sand trap bunches up around the sand in the middle, and you rappel off of a rope tied to all 4 corners. The pull cord is attached to the middle, so the sand trap sheds the sand when you pull the middle out. Practicing LAMAR techniques for this one is critical, as you will likely need to adjust the amount of sand and the friction points before the last person descends. Imlay Canyon Gear sells the sand trap, and offers great instructions on how to use it.
Waterpocket
The Waterpocket is only useful in certain situations, but it’s a cool fairly new piece of gear. It is very similar to a sand trap, but uses water instead of sand. To use a Waterpocket, fill it up for ballast weight and drag it up close to the edge in a place where it won’t slide over. It works best when there’s a lip on the edge of the drop, which is common in many places. It kind of functions like a big grocery bag that fills up with water.
How to use a waterpocket retrievable anchor:
A separate pull cord attaches to the plug, so you can pull it when you get down to the bottom. After draining the water, the waterpocket can be pulled over the edge. Back it up with a meat anchor for all but the last person, and those at the bottom should spot the last person in case it can’t support the weight.
Potshot
Another fairly risky method for executing a retrievable anchor rappel is to set up a few different potshots. The friction has to be just right so that it holds you while you rappel, but so you can pull them down with a friend’s help at the bottom. Too much weight and you have to leave them up at the top, and too little and they come right over the edge with you. Always back them up with a meat anchor for the first person.
Meat Anchor
For short drops of 6-15 feet (2-5m), consider setting up a simple meat anchor. Especially in situations where natural anchors are difficult to find, this anchor is fast to set up, and easy to execute. The idea is to rappel off of the weight of one member of the party, and then help the anchor person down climb. For the person playing the anchor, it’s best to dig into the sand, and lower your center of gravity by sitting or lying on the ground. Send the lightest person over the edge first, and progressively get heavier as you confirm you can support the added weight.
See Also:
Is Canyoning Dangerous? Canyoneering Safety Tips