
Rock climbing has a reputation for being an extremely expensive sport to get involved in, but that doesn’t need to be the case. Equipment is available for first-timers to rent, and a lot of the most expensive equipment is provided for free by the gym.
What Gear Do You Need For Indoor Rock Climbing?
- Climbing Shoes
- Rock Climbing Harness
- Locking Carabiner
- Belay Device
- Chalk Bag
- Chalk Ball
- Loose Athletic Clothing
Some of this indoor climbing gear can be shared with a partner, some of it can be rented for a low price, and some is even provided for free at the gym. The following breaks down exactly what YOU need, as well as the products that will serve you well-
Indoor Climbing Essentials
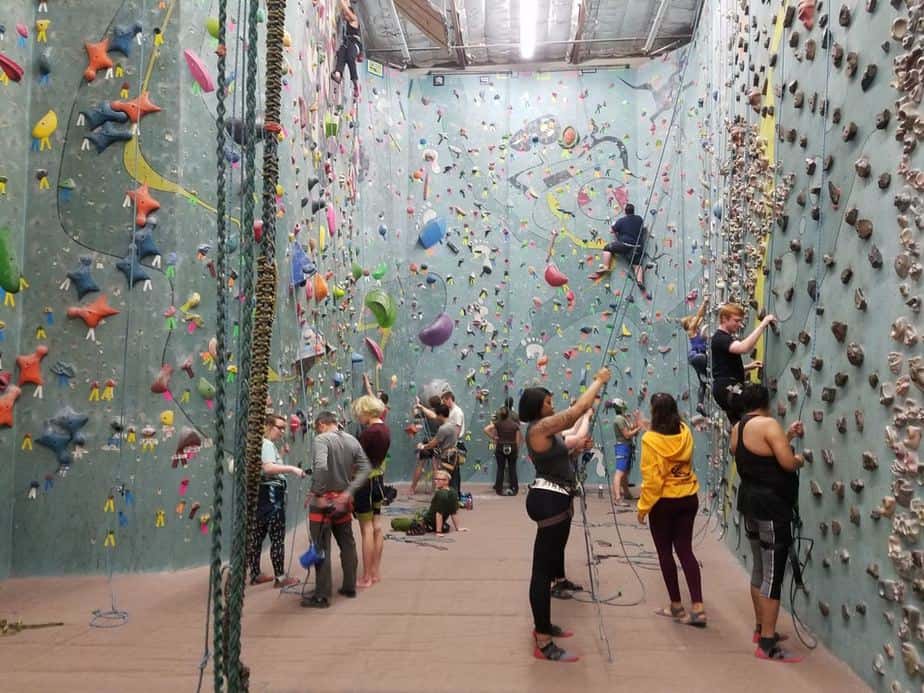
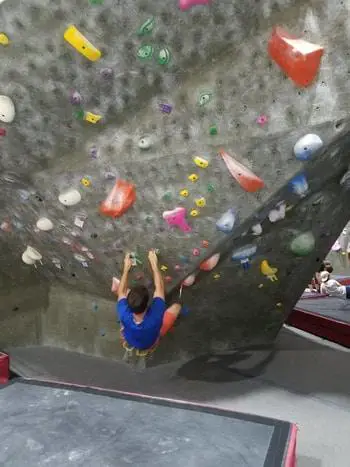
There are two types of indoor climbing for beginners, bouldering and top-rope climbing. Bouldering is climbing shorter walls without ropes, and requires almost no equipment.
Top-Rope Climbing requires a little bit more equipment, but most of the expensive stuff is supplied by the gym. Most gyms have both kinds of climbing, but check the gym’s website beforehand to make sure.
Rock Climbing / Bouldering Shoes
- Rent a pair of shoes your first time, but then buy a cheap pair once you know you like it.
It’s definitely best to rent a pair of shoes your first time climbing. This way you can try on a few different sizes, and get a feel for what you like. Climbing shoes should be tight and form-fitting for best performance, but shouldn’t cut off the blood flow to your toes and make you cry. Renting a pair of shoes for a day usually costs less than $5 USD.
After climbing in rentals a time or two, you’ll be ready to get your own pair. Climbing shoes vary in price from about $30 to $200 or more, and there are a lot of features to consider: laces or straps, aggressive or comfortable, leather or synthetic.
Starting out, you really don’t need an expensive pair of shoes! Your footwork will be poor, and you’ll probably wear them out in a year with consistent use.
Aggressive, expensive climbing shoes do make a difference- once you get to a certain level. Beginning climbers should pick up a cheap (but good quality) pair of shoes and use them as they develop the muscles and techniques unique to rock climbing.
After your first year or so of climbing, or as your shoes begin to wear out, upgrade to a nicer pair. Nicer shoes are made of higher quality materials, they can fit more precise, and can be more aggressive. They will help you as you progress onto the more difficult routes, but really aren’t necessary for beginner-intermediate stuff.
See Also: How To Make Your Climbing Shoes Last Longer
For beginners, I recommend a shoe in the $50 price range. It’ll be as good as you are for the first year! To see my specific recommendations for climbing shoes at the $50 and $100 price range, see my article How Much Are Rock Climbing Shoes?
When you’re ready to upgrade to a good intermediate shoe, try out the La Sportiva Tarantulace (view price on Amazon). It’s a classic shoe with great reviews.
Rock Climbing Harness
- Rent a harness your first time. Not necessary for gyms that only have bouldering. A harness will last you several years, so get one that is versatile enough to use past your beginning stages.
The first time you go to a gym, rent a harness. It costs less than $5, so you don’t have to commit until after you’ve fallen in love with climbing. Indoor climbing harnesses are usually pretty rudimentary, with thick, uncomfortable webbing and no belay loops. It works just fine for first-timers, but you’ll want your own harness pretty quickly. They’re fairly expensive ($50), but last a long time.
A harness is a harness. There are a few cool features you want to make sure to get, but most harnesses meet the needs of indoor climbers.
Unlike the uncomfortable gym harnesses, the harnesses you’ll see others wearing are padded. Manufacturers do use some variation in material, but most are about the same level of comfort.
When you go to buy a harness, I recommend you get one that is adjustable enough to fit you for a few years. Some brands are sized Small, Medium, Large, etc., but others are more adjustable.
If you gain or lose some weight over a year or two, you won’t need to buy a new harness. Also, you can share it with friends who aren’t your same build.
Get a harness with some equipment loops on it that will be used to clip quickdraws when you advance to the next step of sport climbing. You don’t need a million loops, but four or five are nice to have.
The harness I recommend is the Black Diamond Momentum Harness (view price on Amazon). They’re about $50, and comes with the gear loops and setup so you can climb both top rope indoors and sport outside.
Locking Carabiner
- Most gyms will give you a locking carabiner to use while you’re there at no cost (just give them your keys or wallet as collateral).
Carabiners are pretty cheap ($10-$20), and are an essential piece of gear for climbing. Starting out you just need one between you and your partner (to attach to the belay device).
You’ll probably end up with a handful of them pretty quickly since they’re so useful for so many things. Make sure that any locking carabiner you use is rated for climbing and certified by the UIAA / CE. Carabiners without these certifications stamped on them may not withstand the rigors of climbing.
Locking Method
There are a few different features to look at with carabiners. The first is the locking style. Carabiners are either screwgate or auto-lock.
Auto-locking carabiners are nice because it can be a little bit tedious to manually unscrew and screw the carabiner locked every time you open it, and it helps make sure you don’t forget to lock them.
On the other hand, it is really beneficial for new climbers to develop the habit of always confirming that a carabiner is locked. If you have to screw it shut, then you’ll always double check.
Carabiner Shape
The other thing to consider is the shape of the carabiner. I recommend a Pear shaped carabiner for your belay device (or a specialized carabiner for a GRIGRI), and HMS carabiners (also called asymmetrical D shape) for pretty much everything else. You’ll eventually want to pick up some non-locking carabiners as well, but lockers are more versatile.
Make sure you only buy carabiners from reputable climbing companies like Black Diamond, Petzl, Grivel, Cypher, Mad Rock, Kong, Omega Pacific, Edelrid, DMM, Camp, etc. There have started to be some imitations out there that aren’t properly tested, so it’s best to stick with well-known climbing brands.
I like the Grivel Delta HMS screwgate (view price on Amazon) with it’s wide opening. For an auto-locking carabiner, Black Diamond’s Rocklock Twistlock is great (view price on Amazon).
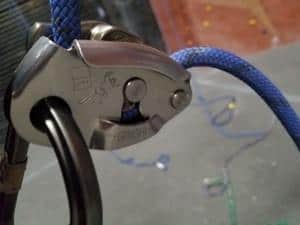
Belay Device
- Most gyms will give you a belay device to use while you’re there at no cost (just give them your keys or wallet as collateral). Some even require that you use their belay devices.
Belay Devices make climbing safely possible. They use friction to effectively slow down and stop the rope from going through. This is the connection point between the climber and belayer, and is critically important. A belay device can easily be shared between you and your partner, so you just need one starting out.
There are two main types of belay devices: tubular devices like the ATC, and assisted-braking devices like the GRIGRI. The primary difference between them is that assisted-braking devices help belayers to catch a falling climber with more stopping power.
A lot of climbers say that you should learn to belay on a tubular device, since it forces you to learn proper technique like not ever letting go of the brake strand.
It’s similar to the idea that you should start out with screwgate carabiners so you always remember to check them. At some point in your climbing career, you’ll climb with an ATC and a screwgate carabiner, so it’s good to learn early on.
An assisted-braking device provides a lot of peace of mind. It can help catch a falling climber if the belayer isn’t paying attention or makes a mistake, which tubular devices don’t do. They’re great for when you’re climbing with novices as belayers.
For indoor climbing, there’s really no need for you to buy a belay device. Every gym I’ve been to will let you use theirs for free.
Once you start climbing outside, you need to consider whether it’s worth paying for an assisted-braking device ($80+) or just getting a tubular belay device ($20). Or, get one of each!
Check out the Beal Birdie as a GRIGRI alternate that’s 20% cheaper (view price on Amazon), and see my review here.
Rope
- All gyms provide the ropes used for top rope climbing at no cost.
There’s no reason to buy a rope as your first piece of gear. You’ll top rope in the gym for a long time before picking up lead climbing, and some gyms even provide ropes for you to lead on.
You don’t need a rope until you start climbing outside. When you do start climbing outside, take a look at our rope buying guide.
See Also: What Is Climbing Rope Made Out Of?
Chalk
- Not absolutely necessary for climbing, but nice to have to keep your hands dry.
In most climbing conditions, chalk is like “Michael’s Secret Stuff” from the movie Space Jam. Chalking up is more of a mental thing than it is a physical help, but it is nice if your hands get sweaty or if it’s hot outside. It helps to keep your hands dry and give a little bit of extra friction on your fingertips.
Just starting out, you really don’t need to worry about chalk. Once you get into it though, chalk and a chalk bag are cheap ($15). Make sure you get a chalk ball / chalk sock, since most gyms don’t allow you to use loose chalk.
You should probably get this chalk bag with a panda bear on it (for obvious reasons).
Clothing
- Loose-fitting athletic clothing that isn’t too baggy.
You can pretty much wear any athletic clothing to the climbing gym, but there are a few things you need to keep in mind. First, if you wear shorts they should go down to at least the middle of your thigh.
This is where the harness leg straps go, and they can be a little uncomfortable on bear skin. The same goes for wearing a shirt or tank top. The harness waist belt can rub on bare skin around your stomach, so it’s usually best to tuck your shirt in.
Be careful not to wear clothes that are too baggy. They can get caught in a belay device. If you have long hair, wear it back and out of the way so that it can’t interfere with the belay device or knot. We wrote a full guide on clothing for indoor climbing, which you can read here- Indoor Climbing Apparel.
Other Non-Essential Equipment
There’s a lot of other non-essential equipment that can be really nice to have. It can ease pain, speed up recovery, and help you climb harder. I wouldn’t get any of it when first starting out, but I think it’s worth it once you have a gym pass.
- Skincare– Your hands are going to get pretty worn down pretty quickly. You can wait for them to heal naturally, or give them some help. Try ClimbOn (view price on Amazon).
- Tape– It won’t take long before you get an infamous ‘flapper.’ Abrasive rock walls (even plastic walls) will rip callouses off of your hands and fingers. Athletic tape will help you keep it together to stay a little bit longer (view price on Amazon).
- Belay Glasses– Spend 20 minutes talking a friend up through the crux of a route and you’ll be begging for some neck relief. You can either give up watching them, or pick up some belay glasses. Belay glasses are great because they help you focus on the climber at all times without hurting your neck. They’re a lot cheaper now than they used to be. We even sell them, so you can pick them up on Amazon or just email us directly.

Equipment for Climbing Outdoors
When you start climbing outdoors, things get a little bit more expensive. You’ll likely start with sport climbing, which means you will need your own rope, belay device, and a few carabiners. In addition to that, you’ll need a helmet, quickdraws, and anchor gear.
Top it off with a first aid kit, knife, and fun toys like a stick clip, and you’ve gone up a few hundred dollars. For a full list of the gear you need for climbing outdoors, check out this article- What Do You Need For Outdoor Climbing?
Trad climbing requires another several hundred dollars in gear and a lot more experience, so we won’t get into that here. Gym climbing is the way to start, and really isn’t as expensive as people seem to think it is. You can rent gear your first few times for under $10, and can pick up the basics later on for under $100.
Related Questions:
Can I Wear Shorts Rock Climbing? Yes, you can wear shorts to climb indoors or outdoors. Wear shorts that are at least mid-thigh so your harness won’t rub on your legs, and be careful not to hit your knees on the walls. Long pants provide better protection.
What Shoes Should I Wear For Indoor Rock Climbing? You can rock climb with tennis shoes, but you’ll have a lot more fun and will be safer climbing in rock climbing shoes. You can rent climbing shoes from a gym for $4 or $5 per day. If you wear tennis shoes, wear the tightest pair you have with a hard sole.
What Is Climbing Equipment Called? Climbers often refer to their equipment as their “rack,” though it is most often referred to as climbing gear.
See Also:
What Knot Do You Use For Rock Climbing?
