

The ATC, also known as a ‘tuber’ is probably the most common belay device that people use for climbing. While there have been a few tweaks and improvements over the past 30 years since its development, the basic idea has remained unchanged. Because most climbers use the ATC as a belay device and almost everyone has one, it frequently ends up being used as a rappel device when rappelling off of a climb or when canyoneering.
How to Rappel with an ATC:
- Check and double check that your harness and anchor are secure and correct.
- Step over the rope so it runs by your right side (reverse if left-handed).
- Angle the ATC so the downhill side is to the right.
- Pinch the rope and thread it through one of the slots of the ATC until the rope aligns with the wire keeper loop on the ATC. If rappelling using both strands of the rope, thread both strands through.
- Clip a locking carabiner through both the wire keeper loop and the rope, maintaining the downhill end of the rope on the right side.
- Clip the carabiner into the belay loop on your harness, and make sure it locks.
- Double check that the carabiner goes through the rope AND the wire keeper loop on the ATC and that it is locked. If there are any twists in the system- the belay loop or the rope and atc, unclip the carabiner and redo it. The rope should come from the anchor on the left (top) side, through the slot in the ATC, follow the wire keeper loop around the carabiner, and come back out the other side of the ATC slot going to the right (downhill).
- Lean back into the rope and simply let it slide through your hands to move. Pull your brake hand (downhill/right hand) behind your back to stop, or swing it out away from your body to reduce the friction and go faster.

Common Errors When Rappelling with an ATC- and How to Avoid Them
Rappelling with an ATC is not complicated; however, the repetitive and simple nature of rappelling sometimes leads people to make careless mistakes. Spend one extra minute before stepping over the ledge to confirm that everything is set up correctly. You won’t regret it! There are a handful of really common errors that are easily caught and corrected with a double check of the system.
The most common error when rappelling with a tuber is for there to be a twist in the setup. With multiple hardware pieces and various types of rope and webbing, this periodically happens to everyone. The rope should come through the slot of the ATC from the top (left), follow the wire keeper loop around the carabiner, and come out the right side of the slot.
The slots in the ATC should be parallel to the ground, or angled with the right side slightly towards the ground. If the rope points upwards when coming out of the ATC, it will twist the belay loop, which weakens the strength of the harness. You will probably be fine rappelling with a twist in the system, but there is always a higher risk of failure when different stresses are added. Additionally, the rappel will flow much smoother if the ATC is angled horizontal or downwards because it applies the friction of the ATC as intended.
 Sometimes, in the rush of getting over the edge of the cliff, the rappeller only clips the carabiner through either the rope or the wire keeper loop- not both. This is especially prone to happen when rappelling on both strands of the rope, because you can’t see the wire loop as easily. Double check to make sure the carabiner goes through the loop created by the rope AND the wire keeper loop on the ATC.
Another common error is when the carabiner fails to lock. This may turn out okay with a screwgate carabiner, but if an auto lock carabiner doesn’t lock, it also doesn’t close. Get in the habit of always screwing carabiners closed, and of checking them to make sure they are closed. With auto lock carabiners, always ensure that the carabiner doesn’t close on the rope, harness, or wire keeper loop instead of on itself. If the carabiner doesn’t lock, you could come unclipped from the rope mid-rappel and take a nasty fall.
I ran into another issue a couple weeks ago while going through a canyon in Zion National Park in Southern Utah. A friend of mine brought an 11mm rope I’d never used before (my canyoneering rope of choice is 8mm). When we came up to the first rappel, I discovered that the 11mm rope was too thick to fit through my ATC! Fortunately, I had an extra 8 ring in my pack that I’d planned on using as an 8 block for the shorter rappels and I was able to use it instead. Keep that in mind if you rely solely on an ATC as a rappel device.
Take care that these errors don’t happen, especially when it’s dark, wet, or cold. For more information, here’s a list of the top 10 most common rappelling accidents , and how to avoid them.

How to Control the Speed of Your Rappel with an ATC
The last thing you want is to hurdle towards the ground at breakneck speed. Before rappelling with an ATC, be sure you understand how to control the speed of your rappel. Holding the rope in your right (downhill) hand, pull it behind your back to stop. You can let the rope slide through your hand and around your side to go slowly. Increase the speed by moving your brake hand out away from your body and letting the rope slide through your hand (we recommend gloves so you don’t get rope burn).
The speed of your rappel depends on several things, including the weight of the rappeller, the diameter of the rope, and the diameter opening of the ATC. The best way to slow things down within the system is to add more friction. Many tubular belay devices have two different sides- one with ridges and one without. They are intended to be used with the ridged side on the right (downhill); however, you can flip it over which will decrease the friction and increase the speed of descent.
To add more friction, you can use two locking carabiners instead of just one. A second carabiner can increase the friction by as much as 20%. If doing this, be sure that both carabiners face the same direction or else the setup will shift when you weight it.
ATC History
Black Diamond originally developed the ATC back in 1993. It was a modification of several previous belay devices, such as the sticht plate. The ATC corrected the problem of the system getting locked up because the plate ran directly into the carabiner, locking the rope. With an ATC, there’s an extra half inch or so which reduces the risk of the belay getting stuck. The other main innovation in the original ATC came from the sharpness of the angles of the ends of the device, which creates additional friction.
While Black Diamond created the original ATC, and maintains the ownership of the name, everyone pretty much refers to any tubular belay device as an ATC. Black Diamond named it the “Air Traffic Controller” as a tongue-in-cheek reference to falling climbers. An ATC allows for smoother control than the previous belay options, which led to better air traffic!
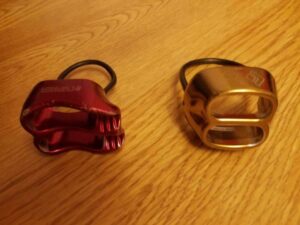
Different kinds of ATC’s
The traditional tuber has two slots, with identical sides. Over the years, companies have improved the original idea to meet different needs. The most common I see around is the Black Diamond ATC XP, where one side of the slots has ridges, which provide additional friction.
Petzl’s version is the Petzyl Verso. As mentioned above, this can be reversed to decrease the friction of the rappel. The Black Diamond ATC Sport is identical to the ATC XP, but with only one slot. You cannot use this when rappelling both strands of the rope, but it works great for climbing. The most versatile ATC is the ATC Guide (or Petzl Reverso), which includes additional loops that allow you to tie off mid-rappel or connect to the wall for a direct belay.
How much does an ATC cost?
The different variations of ATC’s, from the base to the ATC Guide or Petzl Reverso cost between $10 and $30. You will pay more for bigger brand names like Black Diamond and Petzl, or get them for cheaper from brands like Cypher. The more advanced the device, the higher the price- though any of them are relatively affordable.
Related Questions:
What is the Best Rappel Device for Climbing? An ATC is the most popular belay device for climbing, but that doesn’t mean it’s the best. Many climbing gyms have guests use the Petzl Grigri, one of the premier assisted braking devices. They are designed to stop the rope if there is a sudden jerk on the line, such as a lead fall. The downside with the Grigri is the higher price, as well as the risk of complacency with an assisted braking device. Over the past few years, it seems that every climbing company has come out with a new belay device that is supposed to be the best ever. They range in price from $30 to $200, and all essentially accomplish the same purpose. I plan on trying them all out when I get the chance, but for now I’m content with my ATC XP!

What is the Best Rappel Device for Canyoning? An ATC is one of the best choices, although an 8 ring works very well too. The downside with using an ATC for canyoneering is that the don’t perform as well when the rappeller has to be agile and twist around certain obstacles.
They also get mucked up easier with mud and debris often found in canyons. As mentioned previously, an 8 ring will always fit any diameter of rope, and can also be used as an 8 block on retrievable rappels.
Different variations of the 8 ring, including a Rescue 8 and the Kong Oka include different protrusions off of the traditional 8 that allow you to tie off the rope mid-rappel; however, I recently ran into an issue using an Oka rappelling down a waterfall where the rope got tangled around the different sections and arrested my rappel halfway down. I had to endure the torrent until I could loosen the rope enough to get free. I won’t be using the Oka, or anything with tie-off capabilities while waterfall rappelling anymore!
See Also:
How Much Weight Can a Quickdraw Hold?
