
Rock climbing as a sport is growing at a fast pace around the United States and throughout the world. What was once a thrilling, dangerous, daredevil extreme activity is now so mainstream (and safe) that the neighbor kids do it for a birthday party. There’s really no good excuse to stay on the ground!
Here Are 8 Steps To Start Rock Climbing:
- Start Indoors
- Find A Partner
- Learn Safety Tips
- Practice Basic Techniques
- Try Different Types of Rock Climbing
- Get Essential Gear
- Learn Rock Climbing Lingo
- Get Stronger
You don’t need to be Spider-man to pick up rock climbing, nor do you have to live in a van the woods. It’s a perfect way to stay fit, make friends, and have fun. Here’s where you should start-
Start Indoors
Unless there are no gyms around you, the absolute best place to learn to rock climb is indoors. The environment is controlled, the equipment is maintained, and the floor is a giant pillow! You’re surrounded by people with lots of experience who are glad to help you learn.
While climbing indoors is a very different experience from climbing outside, a lot of the fundamentals are the same. It’s a great place to practice climbing, and an even better place to practice falling. Learning to climb in a gym is best.
The climbing gym mitigates a lot of the inherent risk out of rock climbing like rockfall, poor gear placement, and rope management mistakes. While accidents like twisted ankles happen occasionally, it’s a very safe activity. I’ll go into that in more detail ahead.
What to Expect Your First Time at a Climbing Gym
Walking into any gym for the first time can be intimidating. In fact, this insecurity is the whole premise behind the popular Planet Fitness- a “judgement-free” gym for everyone. As a first timer you shouldn’t be intimidated; however there are a few things you ought to know.
Your First Visit
When you first show up to a climbing gym you’ll need to check in at the front desk. There they will ask you to sign a liability waiver (if you are under 18, you will need a parent/guardian to do it for you). The waiver just acknowledges that rock climbing can be a risky activity and clears them of some of the chance of litigation.
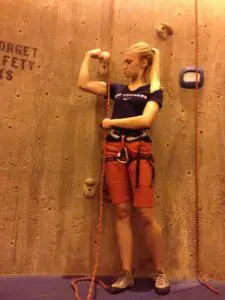
They will also ask you if you need to rent any gear of if you’ve got your own. For your first few times I would recommend renting gear. It’s pretty inexpensive and lets you test out different shoe sizes for comfort and performance. You will need shoes and a harness, and they will usually let you borrow a carabiner and belay device in exchange for your keys or wallet which they will return at the end of the climbing session.
If you have never climbed before, they require that you go through a mini orientation. In a bouldering gym (no ropes, shorter walls), this means teaching you basic etiquette and showing you how to fall safely. In a climbing gym with roped routes, this includes belay techniques followed by a belay test that sometimes includes practice falls.
More on climbing partners follows below, but if you’re going for the first time without a partner you should either take a class or stick to just bouldering. Roped climbing isn’t overly complicated, but it’s best to have an experienced partner.
If you do climb roped, you’ll need to practice tying the rock climbing knot- the figure eight follow through. You can brush up on it here . You need to belay your partner safely as well, using the correct technique.

Climbing Routes
You’ll notice that the walls are a full rainbow of color. It can seem confusing at first glance, but if you look closely you’ll notice a pattern of the same colors going up from the floor to the ceiling. The intent is for you to only climb on the same color holds each attempt (but don’t worry, no one will yell at you if you cheat).
The first holds on each route will have a card on them identifying the difficulty of the route. We go over difficulties and ratings in other articles, but just know that the system in the US starts at around 5.6-5.7 and goes up to around 5.13d in the gym. Bouldering problems start at V0 and go up from there.
What to Wear
When climbing in a gym, you want to wear comfortable athletic clothing. Avoid overly-loose clothing that could get snagged in your belay device, and secure long hair out of the way. It’s best to wear shorts or pants that go down to your knees so that the harness doesn’t rub into your legs.
Katherine wrote an article about Indoor Climbing Attire that you should read for more information.
Pricing
Climbing gyms can have a reputation for being expensive starting out. It really depends on the gym, but generally you can climb your first time with rental gear for around $20-$25. A belay class may cost an extra $15-$25.
If that seems like a lot, check on the gym’s website for deals like date night (2-for-1), college night, or ladies’ night, and look on sites like Groupon for coupons. Once you decide you’re hooked, a monthly pass is your best bet if you plan to go more than once a week. It usually includes lots of other benefits like free classes.
A climbing gym can replace your regular gym pass, as well as other social activities you may participate in. It’s a great way to fit in with a new community and make friends, as well as to stay fit.
See Also: Why Are Climbing Gyms So Expensive?
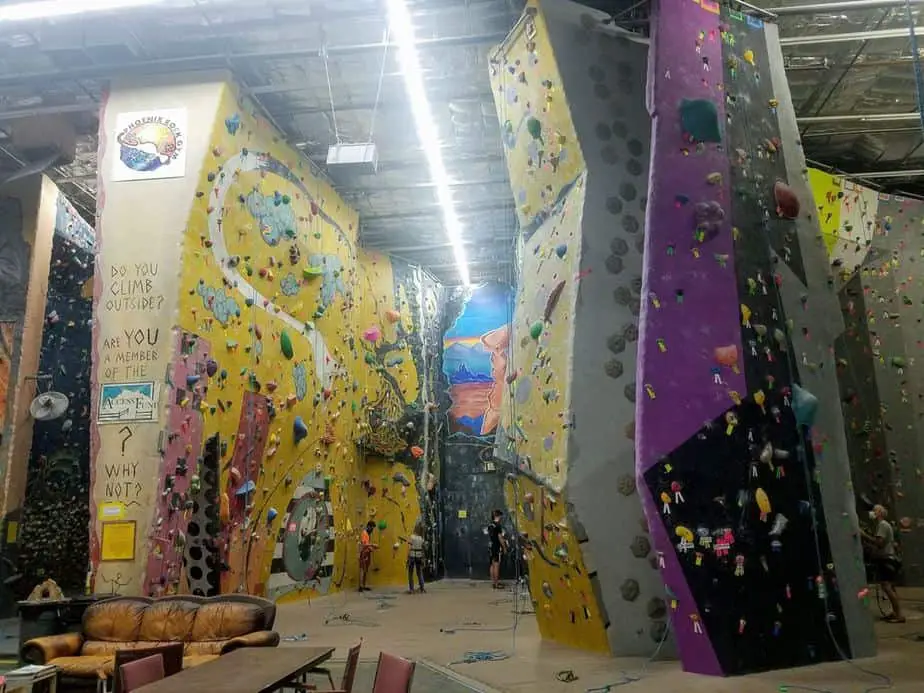
Layout of the Gym
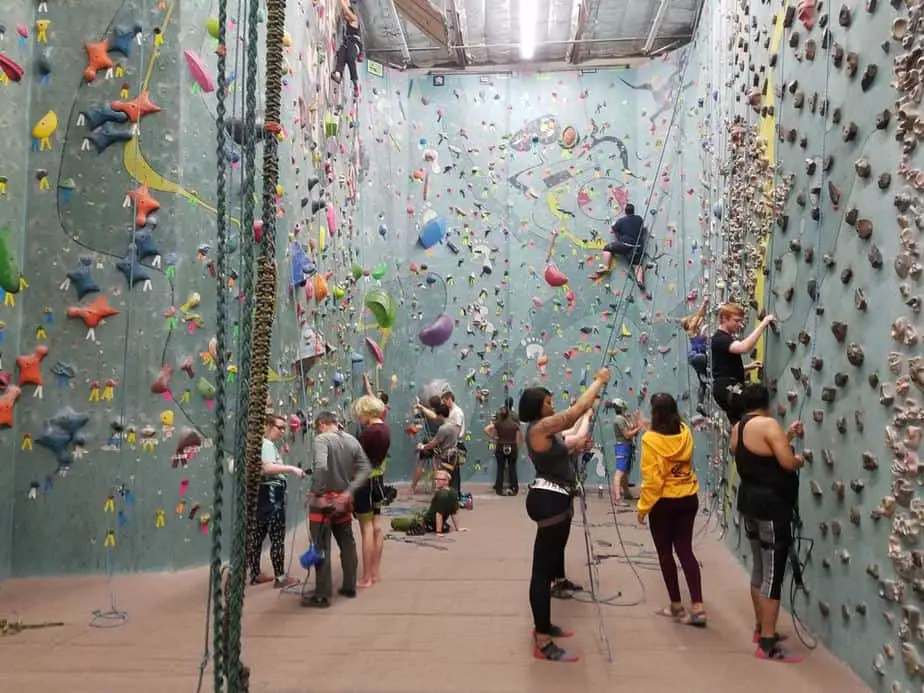
Gyms usually consist of a few different areas with different climbing styles. It can look like a zoo at first, but the areas are easy to define when you know what you’re looking for. There’s always a bouldering area with shorter walls and without ropes. This is where you’ll hear people falling and jumping down from 10-20ft up (3-6m).
You’ll also see an area with ropes dangling from the tops of the walls. This is the top-roping area where you and a partner can practice climbing. The climber ties into one end of the rope and the belayer clips in to the other end of the rope. The belayer takes slack in as the climber ascends, catching them if they fall, and then lowers the climber back to the ground afterwards.
Some gyms also have an Auto Belay area with a rope secured to the bottom of the wall. The auto belay at the top works like a seatbelt- you tie in and start climbing and it automatically takes in the slack as you go. If you fall or when you are ready to come down from the top, you simply let go and it lets you down slowly. This is a great option for your first day, or anytime you don’t have a partner to climb with.
Gyms also might have an area for lead climbing, where the walls are higher than bouldering but don’t have ropes. After passing a test, climbers can lead these routes from the ground up, clipping the rope into quick draws along the way to catch them if they fall. It usually takes a few months before you’re ready for lead climbing.
Some gyms also have a workout / training area with hangboards, free weights, and other equipment. Other gyms have a yoga studio, smoothie bar, or Ninja Warrior training.
Climbing Gym Culture
Most gyms staff employees to wander around the climbing area and watch for careless mistakes. If they do correct you on your technique, know that it’s intended to keep you safe and not as a criticism.
Other climbers may offer tips or recommendations as well, especially if they can tell you’re a novice or using rented gear. It can be slightly embarrassing, but I find it best to thank them and strike up a conversation instead. It’s a great community and you’ll benefit from joining it.
What if there’s no climbing gym nearby?
If there’s no climbing gym in your city, you can still learn to climb. If you have any friends or acquaintances who climb, ask if you can come along sometime to learn and offer to buy them dinner. If you don’t know any climbers personally, get online and look for facebook groups, meetups, or mountain project partner finders to find someone willing to take you out.
You can definitely learn to climb outside (I did, and pretty much everyone who has climbed for more than 10 or 15 years did), but you really need to learn from someone who knows what they’re doing. Check online for a guide who is AMGA certified for single pitch climbing, and they’ll be able to teach you.
Find A Partner
If you have a friend or acquaintance who is a climber or has a gym pass then you’re in luck! Serious climbers may even have extra gear you can borrow (for some reason we tend to hoard). Most climbing addicts I know have a hard time finding a partner who can climb all the time they want to, so we pretty much all are happy to add another partner to the mix.
As I said above, the climbing community is pretty open- especially if you identify yourself as a beginner and are willing to receive instruction. Many gyms have days designated for solo climbers to meet up and climb together. There’s also usually a ‘partner board’ where people can leave contact info if they’re looking for someone to climb with.
Another option, especially if you don’t live near a climbing gym, is to make an account on Mountain Project and use the partner finder feature or post in the local forum. Odds are there will be someone willing to take you out and teach you the basics so you can get a taste for real rock. Meetup.com and Facebook are other ways to meet local climbers.
A climbing partner isn’t completely necessary for all types of climbing. Bouldering in a gym can easily be done solo. For more help finding a partner, check out my article: Can I Go Rock Climbing Without A Partner?
Learn Safety Tips
Climbing has a reputation for being a very risky activity because every time a climber has a bad accident it makes the news. Hanging by a 9mm thick rope hundreds of feet in the air seems to border insanity for many people, as well as a confusion for how climbing works.
The first thing you need to know is to trust the gear. Certified climbing gear manufactured by a reputable climbing company (Black Diamond, Petzl, Metolius, Beal, etc.) is rated to handle much more weight and force than is even possible for a climber to apply to it.
A regular climbing rope could lift a car (as far as weight goes. Don’t bounce the car or it’ll snap!), and carabiners can do the same. Several studies have found that the most force a climber can possibly exert in a long fall is 5-6 kiloNewtons, and most climbing gear is rated above 20kN. See my article How Much Weight Can a Carabiner Hold? for more detail.
While gear failure is largely a myth perpetuated by people who don’t understand rock climbing, accidents still do happen. The most common accidents are caused by human error- not falling rock or random chance. Here are some crucial tips for climbing safely.
Double Check…Then Double Check Again
Many climbing accidents happen because of dumb mistakes. One of the very few gym fatalities happened when someone forgot to clip into the rope before climbing to the top of the wall. While unfortunate, things like this would never happen if climbers always double checked their setup before stepping onto the wall.
Sometimes climbers tie the figure 8 follow-through incorrectly (see What Knot Do I Use For Climbing?), or tie it to the wrong point of their harness. Sometimes belayers thread the rope through wrong or use incorrect technique to belay.
If you get in the habit of checking each other’s gear before each climbing route, the chances of an accident occurring are minimal. Communicate with your belayer, double check your knot, and then double check it again.
Falling
One of the most dangerous aspects of climbing is falling (duh). Your strength and technique aren’t going to be enough to get you through every move and up every wall, so you’ll undoubtedly get used to falling. A controlled fall shouldn’t be dangerous at all, so it’s important to learn to do it right.
When you first start out climbing, it’s critical that you practice falling. That’s right- climb up 5 to 10 feet (2-3m) in the bouldering area and then drop down to the ground. Practice landing and rolling to dissipate the force caused by the fall. Practice making sure you don’t hit your head on the ground and don’t twist an ankle or land on your wrist.
With a rope, practice falling distances of 5-10 feet (2-3m) up on the wall. Get the feeling of pushing away from the wall when you’re about to fall so you don’t scrape your legs against it. Practice remaining head-up so you don’t inadvertently flip upside down and hit your head.
Be aware of your surroundings as you go, noting people in your vicinity and near your fall zone. I have a couple of friends who have twisted or broken ankles when someone walked underneath them as they fell or when they landed on something like a water bottle.
As you practice and get used to falling, your confidence will increase and safe falls will become a part of your muscle memory. This is one of the best things you can do to learn safe climbing skills.
Getting Back Down
A huge proportion of climbing accidents happen when the climber is coming back down from the top of a route or problem. With bouldering, climbers either ‘top out’ by climbing over the top of the boulder and walking off/downclimbing an easy part, or jump from the high point.
While bouldering problems aren’t as high up as roped climbing walls, you don’t get a rope to arrest your fall. Downclimb to a safe height before jumping, make sure nothing and no one is below you, and land correctly.
With roped climbing, the risk of minor injury decreases but the risk of major injury slightly increases because of the height. Accidents happen outside on occasion when climbers make dumb mistakes at the top of a route.
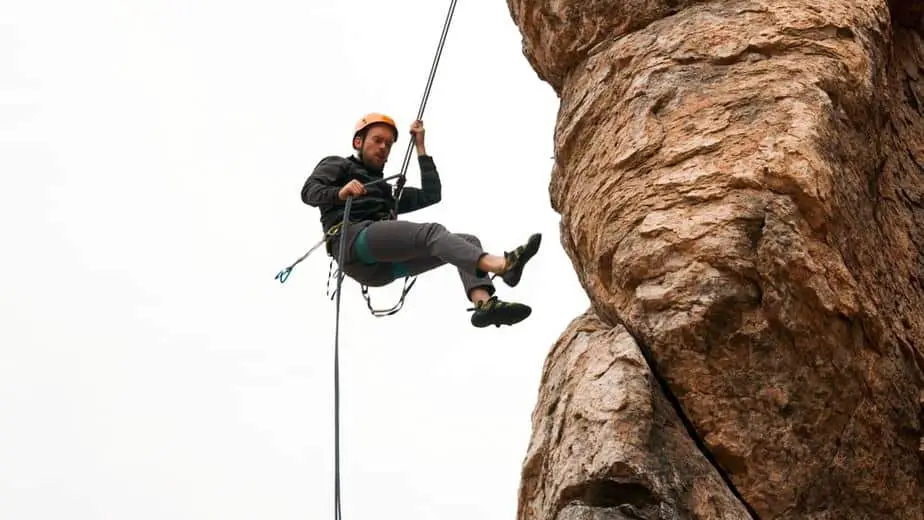
Sometimes climbers reach the top and forget to secure themselves to the anchor before removing the rope. Other times they lean back on the rope expecting the belayer to lower them, when the belayer thought the climber would rappel (this means a fall on your back from the top of the route). Always stop and think before committing to the system, and communicate with your belayer.
Getting back down is probably the most dangerous aspect of climbing because you reach the top and are pumped physically and stoked mentally. This makes it easy to overlook simple safety techniques and make a critical mistake.
Rope Safety
As mentioned above, always confirm that you are tied in correctly to the rope. Most gyms teach you to trace the figure 8 knot, counting the 5 pairs of double strands as they weave around the shape and come out the top. Do this every time and you’re a lot less likely to make a mistake.
For the belayer, make sure the rope feeds through the belay device correctly and test the flow by tugging on the rope to simulate climbing and falling. Confirm that it’s installed correctly and that the carabiner is locked.
When climbing outside, make sure you always tie a stopper knot in the end of the rope to prevent it from slipping through the belay device if the cliff is taller than expected. When tying into the anchors, always secure yourself first. Double check that you’re connected safely again before committing to the rope.
Rock climbing really doesn’t deserve the stigma of danger that it’s received, and can be done safely with correct techniques. Most accidents are caused by human error because of the high stakes, so double checking your setup each and every time will help you climb safely. For more information on climbing safety, read these two articles I wrote:
Is Indoor Rock Climbing Dangerous?
How Many People Die Rock Climbing?
Practice Basic Techniques
Raw physical strength will only get you so far. I remember climbing occasionally through college and being really frustrated to see 12 year old boys and girls out-climbing me! They were in classes and were learning really good technique whereas I was mostly forcing myself up the wall.
Fingers
Your finger strength is definitely going to be your weakest link. Holds are often insufficient for you to fully grip, so you end up just using the last segment of your fingertips to hold yourself.
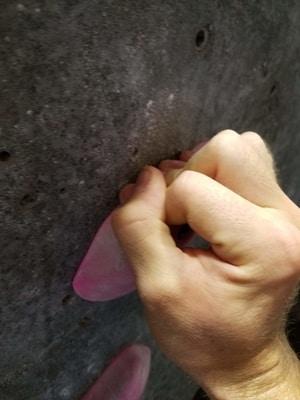
A climbing technique called crimping uses your thumb to strengthen your weaker fingers. With crimping, your thumb wraps up around the top of your fingertips to lock them in place. It may not seem like much, but can really help add a little bit of extra strength when required.
Arms
Try hanging from your arms with them fully extended. Now try hanging with your biceps at a 90 degree angle. It’s a lot easier to hang from your frame instead of hanging from your biceps. Your arms wear out much more quickly than your shoulders and back, so do your best not to do pull ups up the wall.
Look at the size of your quads/thighs. Now look at your biceps. You can lift yourself with your legs all day long, but will tire your arms out really quickly. Use your arms to balance yourself on the wall while using your legs to lift up. It can be hard to learn to trust your toes on smaller holds, but it will help you climb a lot longer sessions.
Toes
Climbing shoes are designed to carry your whole weight on the tip of the toes. Beginners often have a hard time trusting the shoes to stick so they try to plant the sides of their feet or their heels on the holds instead of their toes. The sharp edge of the toe makes it the best and most secure place to step.
Don’t let your feet relax too much. They should remain perpendicular to the wall. If you let your heels drop below the hold your toe is on, you’ll slip off. Take advantage of the sharp edges of the shoes.
I detailed more tips in my article: 13 Tips For Beginning Rock Climbers – What I Wish I’d Known
Try Different Types of Rock Climbing
As you know by now, there are lots of different styles of rock climbing. The most common that you’ll see in a gym are bouldering, top rope climbing, and sport (lead) climbing. The outdoors includes lots of other variations including trad climbing, ice climbing, aid climbing, deep water soloing, free soloing, and highball bouldering.
Top Rope Climbing
Top Rope Climbing is the most common climbing style found in an indoor gym. Ropes go from the ground up to the anchor (usually a big bar in a gym) and back to the ground again. The anchor functions like a pulley, with the climber and belayer on either end of the rope.
See: What Is Top Rope Climbing? Everything You Need to Know
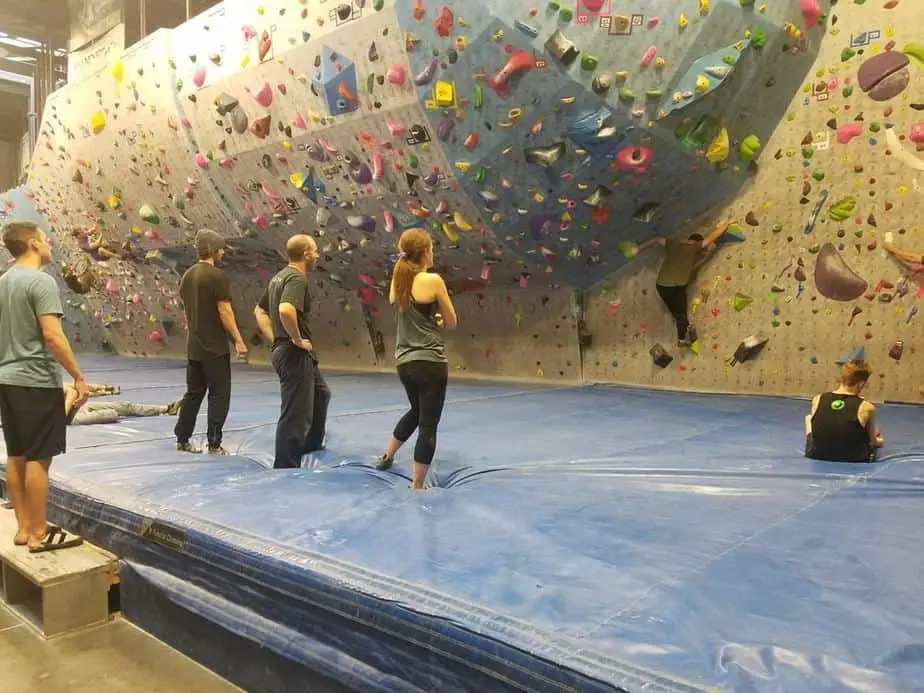
Bouldering

Starting with bouldering is a great option for most people since all you need are climbing shoes. You can practice on the easiest problems and stay as low to the ground as you want. You don’t need a partner for bouldering since there are no ropes involved.
Sport Climbing
Sport climbing (also referred to as lead climbing) is the next logical step after top roping. With sport climbing the climber has to bring the rope up to the anchor before descending. This involves clipping the rope to quickdraws connected to bolts every few meters on the wall. If the climber falls, they fall just past the highest bolt that’s been clipped.
Trad Climbing
With trad (short for traditional) climbing, there are no permanent bolts in the wall to clip protection to. Climbers have to wedge special devices called cams or stoppers into cracks and other fissures in the wall. Trad climbing is more advanced than sport climbing, and more dangerous because gear can pop out if placed incorrectly.
See: Is Trad Climbing Really That Dangerous?
Ice Climbing
Most climbers never climb on ice because of the increased risk and that it can only be done in colder climates. With ice climbing, climbers use ice axes (picks) and crampons to climb up sheets of ice, placing ice screws in the ice as they ascend instead of trad gear.
Aid Climbing
Aid climbing is also much less popular than the main 3, and is usually only found in older areas because the ethics have changed over the last 50 years. With aid climbing, the route setters place permanent bolts and rebar ladders in difficult sections so that they can be passed using etriers (rope ladders) and other techniques.
Deep Water Soloing

DWS or Psicobloc is a really cool variation of climbing on cliffs over water. No ropes are used, so you just fall or jump into the water when you finish. It can only be done in specific areas so if you live near one, check it out!
Free Soloing and High Ball Bouldering
Ironically, free soloing may be the most well-known form of climbing thanks to Alex Honnold’s Oscar-winning movie. The vast majority of climbers would never attempt free soloing for obvious reasons. High-ball bouldering is similar, though on really tall boulders instead of full cliffs.
Get Essential Gear
There’s no reason to buy climbing gear before going to the gym for the first time. Rentals usually cost between $3 and $5 dollars each for shoes and a harness. That being said, if you plan on going more than a couple of times in your life, gear up!

Gear for Climbing Indoors
There are two things you really need for climbing indoors- shoes and a harness. You can get each of these for under $50 for a beginner set, which is what I recommend starting out.
All harnesses are pretty much created equal, so there’s no reason to splurge on an expensive one. Shoes, on the other hand, pretty much increase in value with the price. You’re fine to go for a cheap pair starting out, but you’ll want to buy nicer ones as you improve.
You may also want a chalk bag and chalk ball for indoor climbing, though they aren’t necessary. Most gyms let you either borrow a carabiner and belay device or make you use their belay devices (usually a GriGri).
See My Aricle: Indoor Climbing Essentials
Gear for Sport Climbing Outdoors
When you’re ready to take it to the next level, you’ll really have to spend a few hundred dollars to start going outside. The main things you’ll need are a helmet, 60+m dynamic rope, ~12 quick draws, a personal anchor, and a handful of locking carabiners.
See My Article: What Do You Need for Outdoor Climbing?
Learn Rock Climbing Lingo
Stepping into the gym for the first time might make you think you’re in another country listing to some sort of pidgeon variation of your language. Most of it sounds the same, but you’ll hear a lot of weird words that may not make sense at first. This will help you make sense of it-
Anchor- The bolts and chains or metal bar at the top of the route that the rope goes through before heading back down.
Bouldering- A ropeless form of climbing on shorter walls or boulders.
Belay- The act of keeping the rope taught while the climber ascends, catching them if they fall.
Belay Device- Specialized device used to add friction to a rope to assist with belaying. The most common types you’ll see are a GriGri and ATC.
Beta- Sharing tips on a route before climbing it; usually frowned upon in the climbing world if unsolicited.
Crag- Slang term for an outdoor climbing wall or cliff.
Crux- The hardest move or section of a route or problem is the crux.
Pitch- A section of cliff that can be climbed in one rope length (usually up to 30m).
Problem- Bouldering routes are called problems because they can be as much of a mind game to understand as they are physical challenge to overcome.
Project- A single route or problem that a climber practices over and over again over a period of time is their ‘project.’
Send- Successfully climbing a route is referred to as ‘sending’ it.
Whipper- Taking a long fall on the rope can be called a whipper.
Get Stronger
One of the best things about climbing is that pretty much anyone can do it. You don’t need to be extremely fit or really brave. There are plenty of easier routes to spend your time on as you’re getting started and learning the ropes (sorry).
As you get more into it though, you’ll gradually want to push your climbing grade- not to compete with other people, but just to feel like you are getting stronger and improving.
Physical Strength
One of the best things you can do to increase your climbing ability is pull ups. You don’t need to be able to do a thousand, but doing at least 10 will help you break into the intermediate grades.
You’re only as long as the weakest part of your climbing body. For most of us, that’s grip strength or finger strength. Fingers don’t have a lot of muscles to develop; most of the strength comes from tendons. Tendons get stronger through use over time rather than ‘lifting.’
Don’t hurt yourself by climbing too much (3-4x per week is a good amount). Take rest days and pay attention to soreness in your tendons. You can build grip strength over time by hanging from your fingertips and just by climbing more!
Overall physical fitness is also an important aspect of climbing. Strengthening your legs and core are key to pushing your climbing grade. Maintaining a healthy weight means you don’t have to haul as much of you up the wall.
Mental Strength
One of the biggest challenges for people is the mental edge needed to climb 80 feet above the ground suspended by a 9mm thick rope. It’s important to get comfortable with heights and risk up on the wall or else the fear will negatively impact your climbing ability.
It’s important to have a healthy respect for heights, but you shouldn’t be scared. Learn to trust the rope and to trust your climbing partner.
Falls can be terrifying for novice and intermediate climbers. The best way to overcome this fear (or at least understand it) is to take some practice falls. As you get used to falling correctly it will become less scary. This will help you commit to harder routes and moves with a higher chance of slipping.
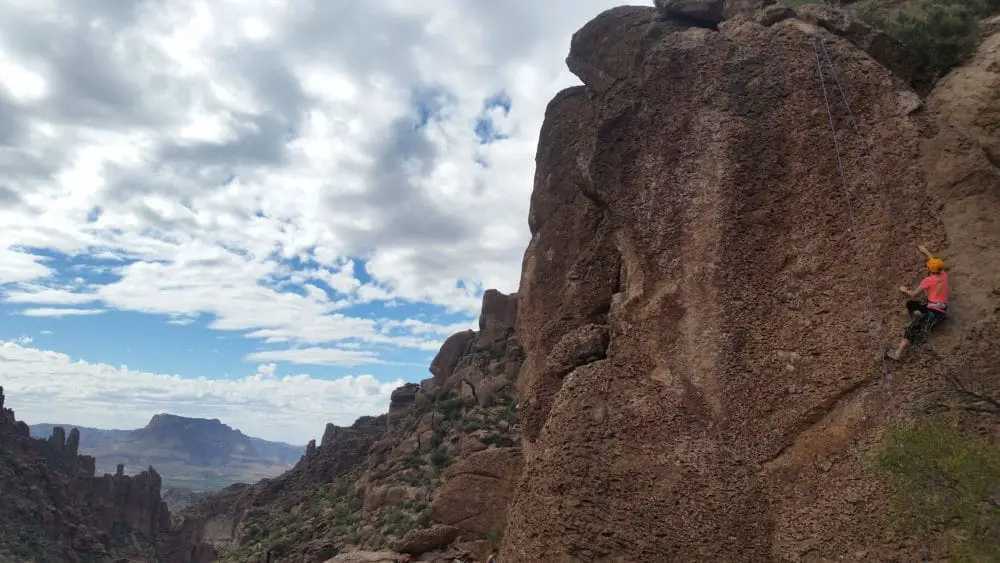
Taking It Outside
The best part of climbing is climbing outside. You get to see beautiful, remote places and get to really pit yourself against a cliff. Climbing outside is a lot more like puzzle-solving than indoors because the correct hand and foot placements aren’t brightly colored!
There are more risks to climbing outside, so it’s important to learn from someone who really knows what they’re doing. Learn correct techniques and rules, and practice them until you really know your stuff.
Never let yourself get complacent, no matter how experienced you are at climbing. A chart that I created based on accident reports shows that there’s very little correlation between your climbing experience level and the frequency of accidents. This means that accidents can happen to anyone.
Climbing indoors is like climbing on a playground. It’s a ton of fun and is excellent for building fundamental skills and getting stronger, but the heart of climbing is outside.
Related Questions:
Is Rock Climbing Hard for Beginners? Climbing routes come in all difficulties, so anyone can try rock climbing. Generally, if you can climb a ladder then you can rock climb. The easiest routes start at V0 or 5.6 indoors.
What Does the 5 Mean in Rock Climbing? The 5 in climbing grades means it requires protection like a rope. The Yosemite Decimal System includes different classes of hiking and scrambing from 1 to 5, and then 5.1, 5.2, and on. At 5.10 they begin adding the letters a-d to signify increasing difficulty.
How Do Rock Climbers Not Fall? Climbers use safety equipment like harnesses, ropes, and carabiners to secure them to the wall. They either use permanent bolts or temporary trad gear to connect the rope to the wall so if they fall they are caught. A second climber (belayer) keeps the rope taut to catch the climber if they fall.
See Also:
Indoor vs Outdoor Climbing: What You Need to Know
